In this post we will be looking at analyzing a STM32 firmware binary in Ghidra. In particular the firmware is for the STM32F103C development board from STMicroelectronics.
The file can be downloaded from this link.
Analyzing firmware binaries is often different from analyzing a PE or ELF file. A PE (Portable Executable) is the standard executable file format on Windows. An .exe file is a PE underneath. The PE file format is intended for 32-bit Windows systems. There’s the PE64 file format which is similar to PE but intended for 64-bit systems.
Correspondingly on Linux we have the ELF (Executable and Linkable format) file which serves the same purpose. Both of these file formats have a definite structure. They have a header which describes how the file will be laid in memory when executed. The addresses of the code and data sections are all provided in the file header. Disassemblers such as Ghidra use this information to automatically differentiate between code and data and load the file at the correct address.
A flat firmware file on the other hand is just a binary blob, a bunch of bytes with no header or metadata describing the layout of the file. When examining such a file the analyst themself have to provide the information to Ghidra.
Preliminary Analysis
Let’s go ahead and load the firmware in Ghidra. Since it is a raw binary file Ghidra doesn’t know how to process it.
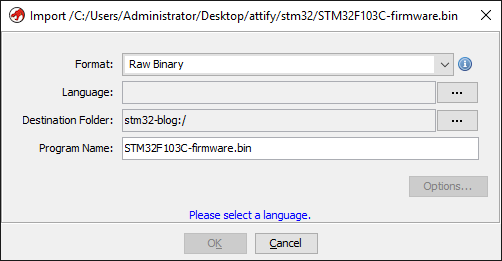
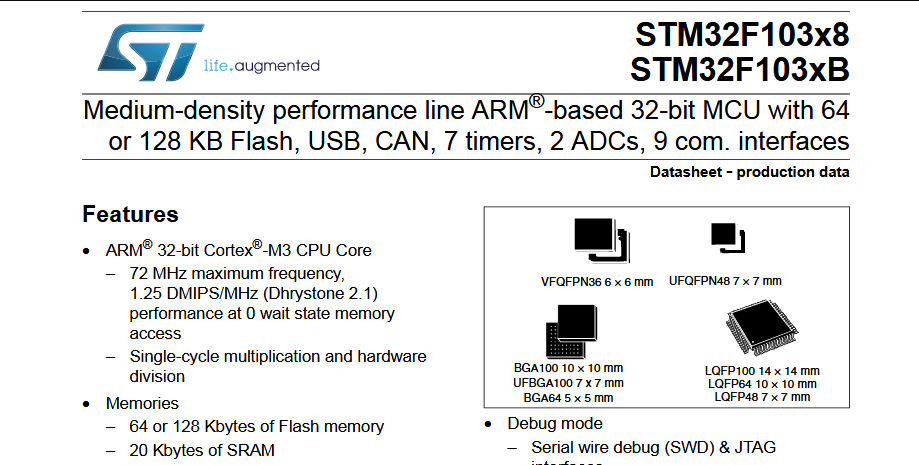
STM32F103 are a series of microcontrollers powered by the ARM Cortex-M3 processor. Cortex-M3 is a 32-bit processor. Let’s click on the Language options button and set "ARM-Cortex-32-little" as the language.
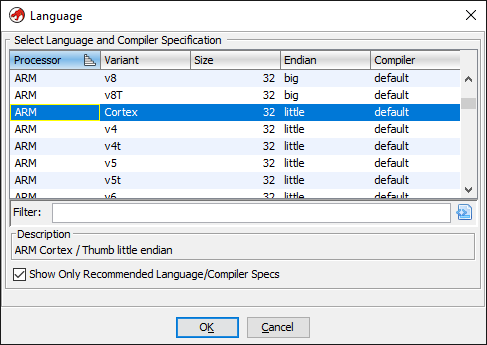
Leaving the other options as-is we can now continue loading the file and double click to open in the disassembler.
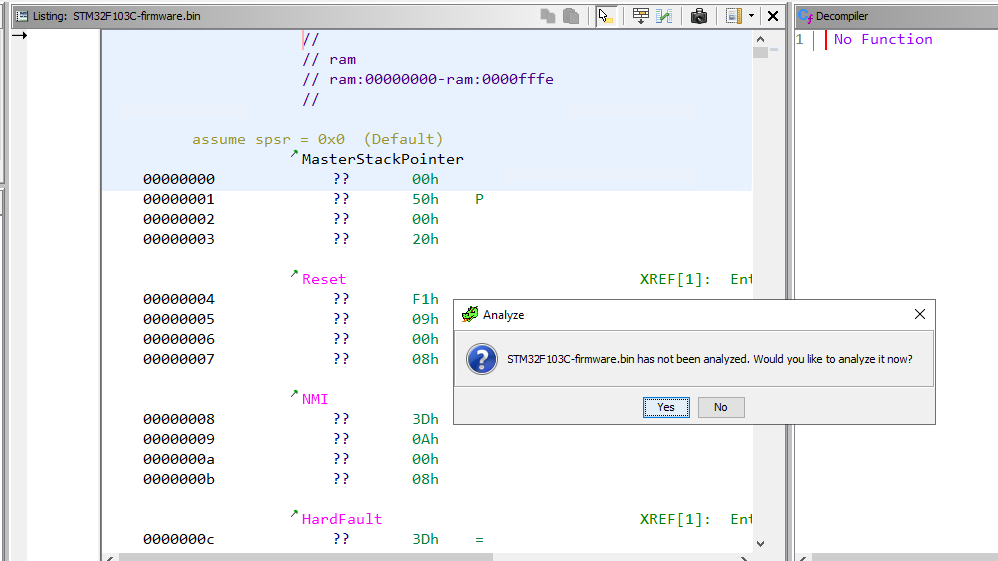
Ghidra will prompt to analyze the file and we click yes keeping the default analysis options. Let’s have a look at the disassembled code after analysis finishes.
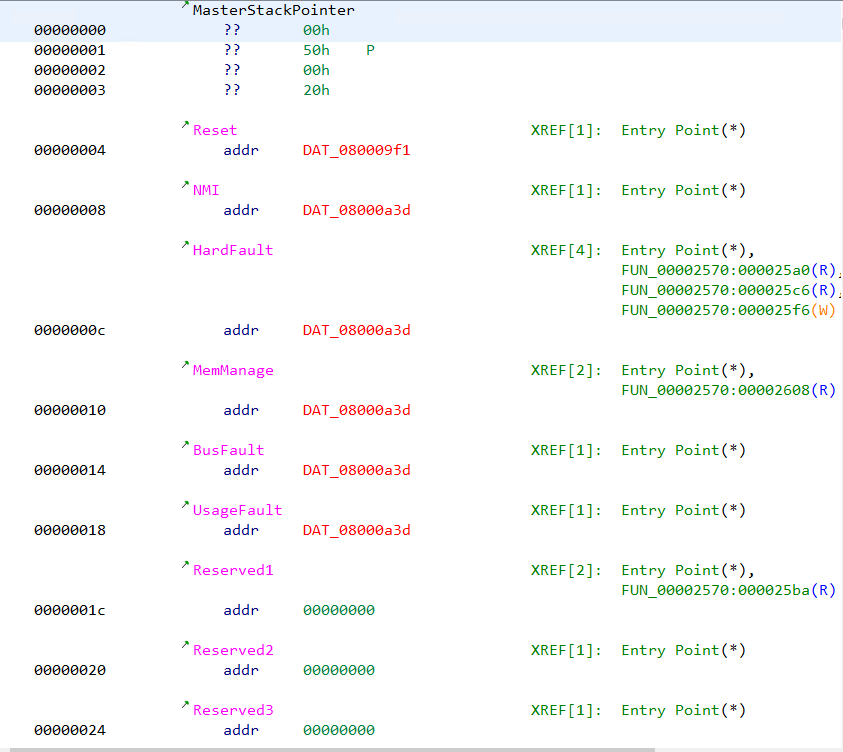
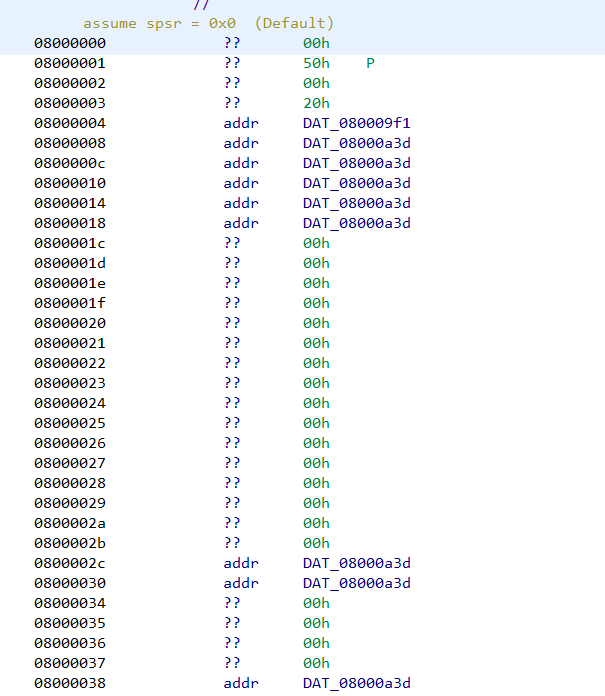
We can note that several addresses are marked with red colored text. The addresses are of the form 08000XXX. Ghidra marks an address in red when the specified address doesn’t exist in the file. Double clicking on the address doesn’t lead anywhere.
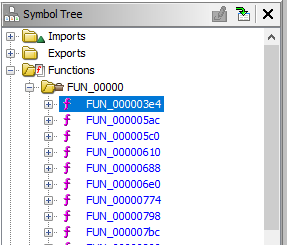
Similarly let’s analyze the disassembly listing of any function (say FUN_000003e4) by clicking it on the symbol tree.
The disassembly listing has several other addresses marked in red.
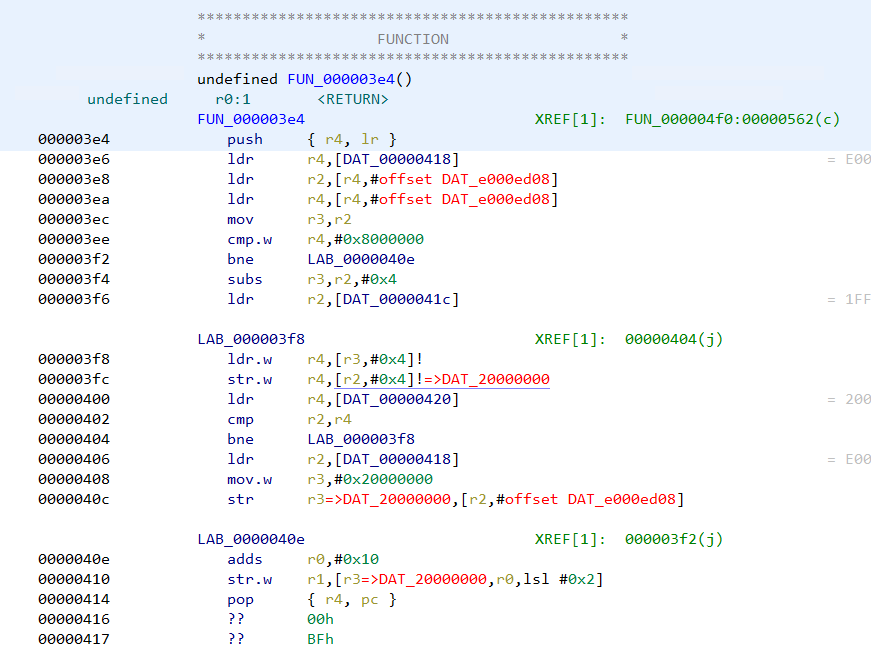
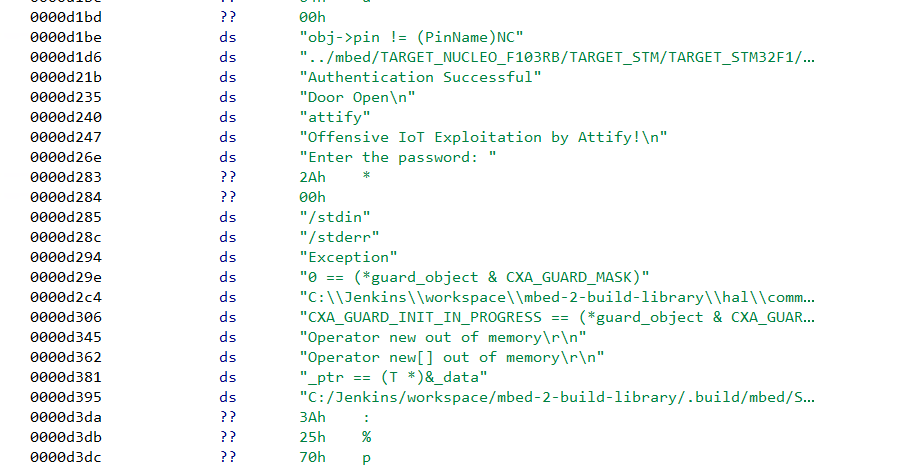
There are references to addresses of the form e000xxxx and 20000xxxx which Ghidra wasn’t able to resolve. Moreover if we search for strings we can see the strings don't have any references pointing at them.
All of this indicates that we have not loaded the file at the right address. Had we specified the correct address when loading the file in Ghidra, at least some of the strings would have a reference pointing at them if not all.
Hence our next step is to find the correct loading address in memory for a STM32 firmware. This information can often be found in the device datasheet and in compiler header files.
Going through the datasheet
In the stm32f103x6.h header file we can see the base address of flash is 0x08000000. This explains the presence of 0x08000xxx address in the disassembly listing. Hence the loading address for the firmware is 0x08000000.
SRAM starts at 0x20000000 which explains the 20000xxxx addresses.
#define FLASH_BASE            0x08000000UL /*!< FLASH base address in the alias region */
#define FLASH_BANK1_END       0x08007FFFUL /*!< FLASH END address of bank1 */
#define SRAM_BASE             0x20000000UL /*!< SRAM base address in the alias region */
#define PERIPH_BASE           0x40000000UL /*!< Peripheral base address in the alias region */

#define SRAM_BB_BASE          0x22000000UL /*!< SRAM base address in the bit-band region */
#define PERIPH_BB_BASE        0x42000000UL /*!< Peripheral base address in the bit-band region */


/*!< Peripheral memory map */
#define APB1PERIPH_BASE       PERIPH_BASE

[...]

#define FLASH_R_BASE          (AHBPERIPH_BASE + 0x00002000UL) /*!< Flash registers base address */
#define FLASHSIZE_BASE        0x1FFFF7E0UL    /*!< FLASH Size register base address */
#define UID_BASE              0x1FFFF7E8UL    /*!< Unique device ID register base address */
#define OB_BASE               0x1FFFF800UL    /*!< Flash Option Bytes base address */

#define DBGMCU_BASE          0xE0042000UL /*!< Debug MCU registers base address */
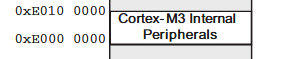
The same information can also be found in the processor memory map from the device datasheet.
Recreating the memory map in Ghidra
Let us re-import the file once again in Ghidra but specifying the correct base address this time. The base address can be specified by clicking the options button in the import dialog.
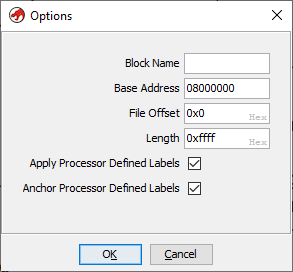
Note that the base address has been set to 0x08000000. Going ahead with the analysis we can see the 0x08000xxx addresses are no longer marked in red. This is because Ghidra is able to locate the address within the file.
In a similar way we can create the SRAM segment at 0x20000000. From the datasheet we know, STM32F103C8 devices feature a flash memory size of 64KiB and SRAM of 20 KiB. Our firmware file is already 64KiB in size. 20KiB is 0x5000 in hexadecimal.
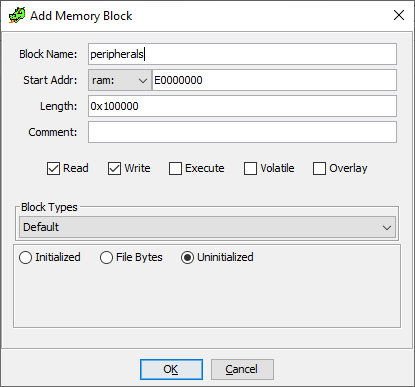
Next go to Window -> Memory Map and click on "+" to add a new memory block. Specify 0x20000000 as the base address and 0x5000 as length.

The peripherals are located at address 0xE0000000 for a length of 0x100000 bytes.
Correspondingly we can create the memory block in Ghidra.
Going back to FUN_080003e4 we can note that the addresses are no longer marked in red.
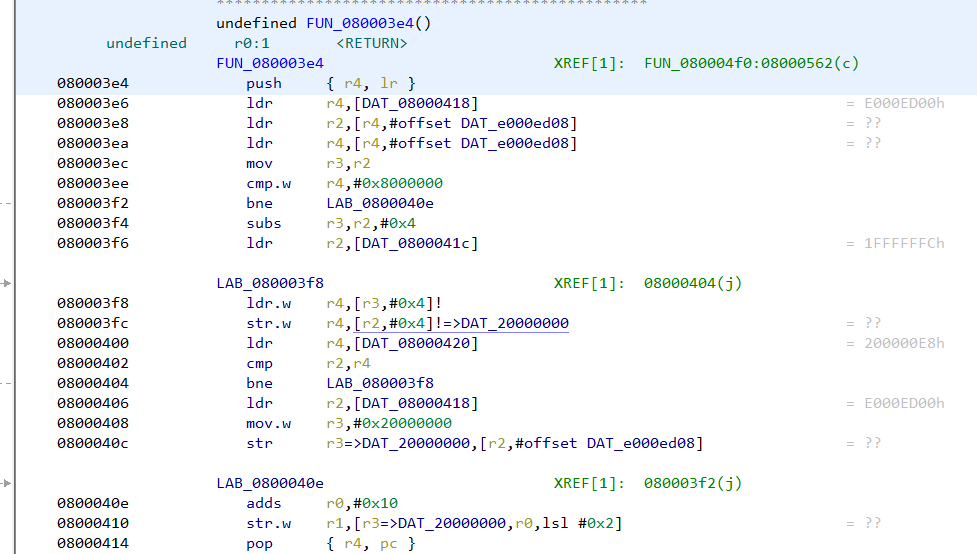
In the same way, the strings have references showing up next to them.
This implies we have loaded the file at the correct address with proper memory mapping.
Analyzing the firmware binary
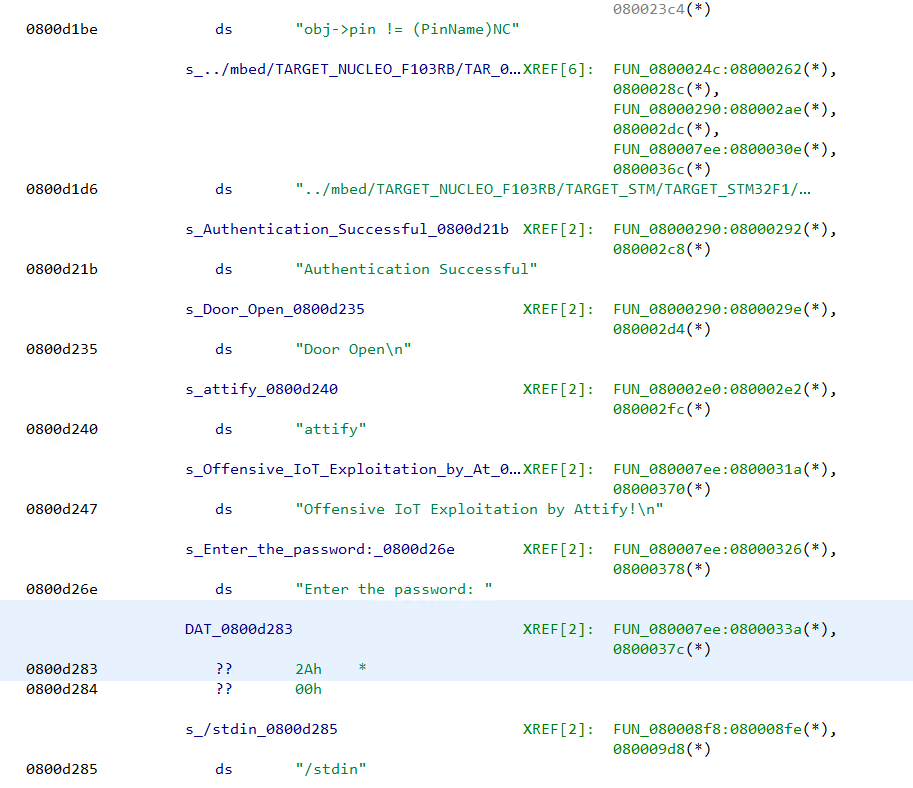
Presence of the strings "Enter the password", "Authentication successful" indicates that the firmware has some sort of password checking logic. The string "Enter the password:" has a reference from the function FUN_080007ee. The decompiled code looks like
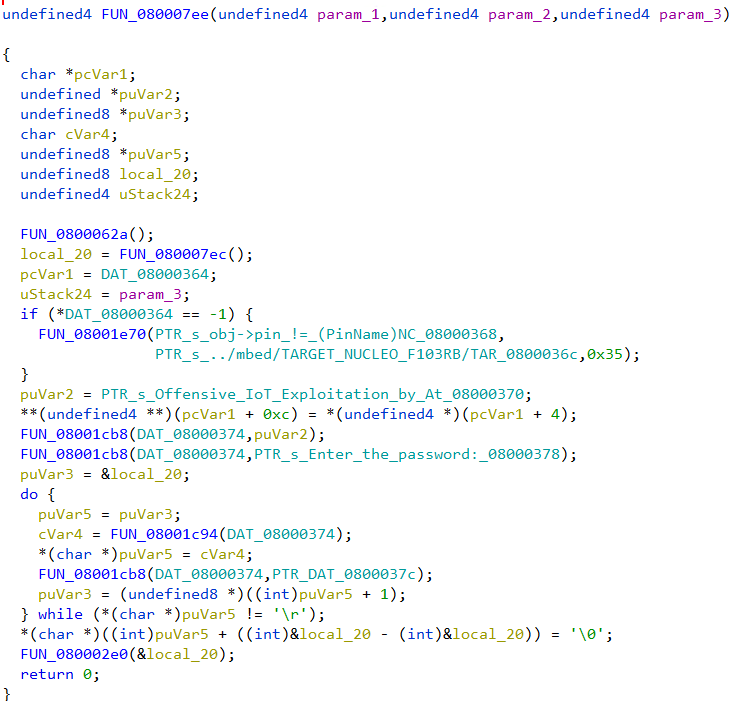
Going through the decompiled code we can infer that the firmware reads a string byte by byte till it encounters the \r character. The password is stored in the variable local_20. Then a call is made to the function FUN_080002e0 passing in the password buffer as an argument.
The decompiled code of FUN_080002e0 is simple.

The password buffer along with a pointer to the string "attify" is passed on the function FUN_08003910. If the function returns zero, FUN_08000290 is called. Else it calls FUN_0800024c for a non-zero return value.
FUN_08000290 looks like
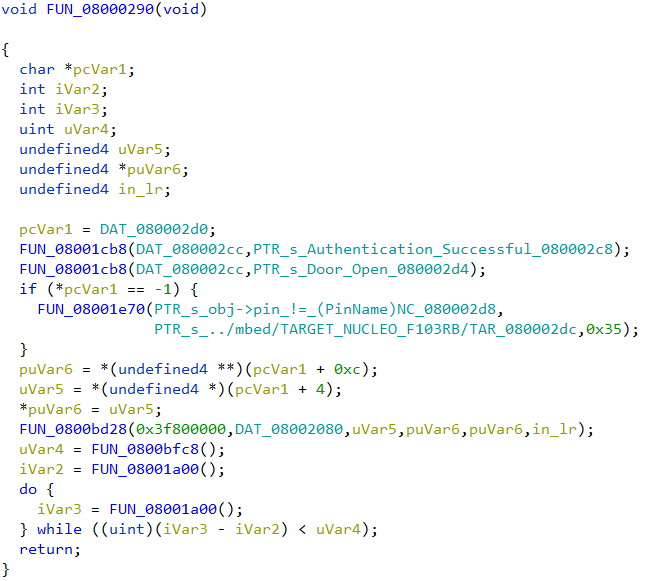
Presence of the string "Authentication successful" indicates that this function will be called if the password was correct.
In the other function, FUN_0800024c we can see the "Authentication Failed" string which implies this will be called if the password is incorrect.
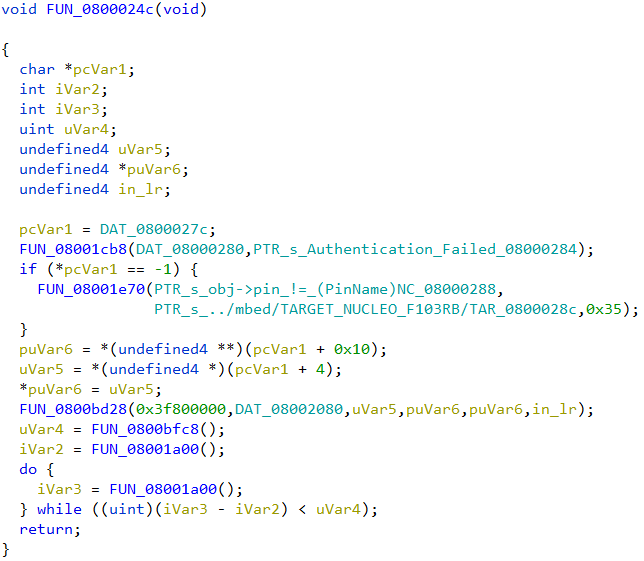
We can deduce that the function FUN_08003910 is strcmp, doing a string comparison of the two strings passed in. strcmp returns 0 when the two strings match (equal). The correct password is thus the string "attify", passed as the second parameter to strcmp.
Using SVD-Loader
SVD-Loader from Leveldown Security is a Ghidra plugin to automate the creation of memory segments and peripherals for bare metal ARM firmware. The plugin parses SVD files and automatically creates the memory segments. SVD field for various ARM platforms can be obtained from the cmsis-svd GitHub repository.
Installing SVD-Loader in Ghidra is simple. After cloning the repo, the path to the directory can be added to the list of Script directories in Script Manager. Script Manager can be accessed from Window -> Script Manager.
Before running SVD-Loader we need to ensure that the file is loaded at the correct base address 0x08000000 in the same way as we did before. Once the firmware has been loaded in Ghidra, we can run SVD-Loader.py script from script manager.

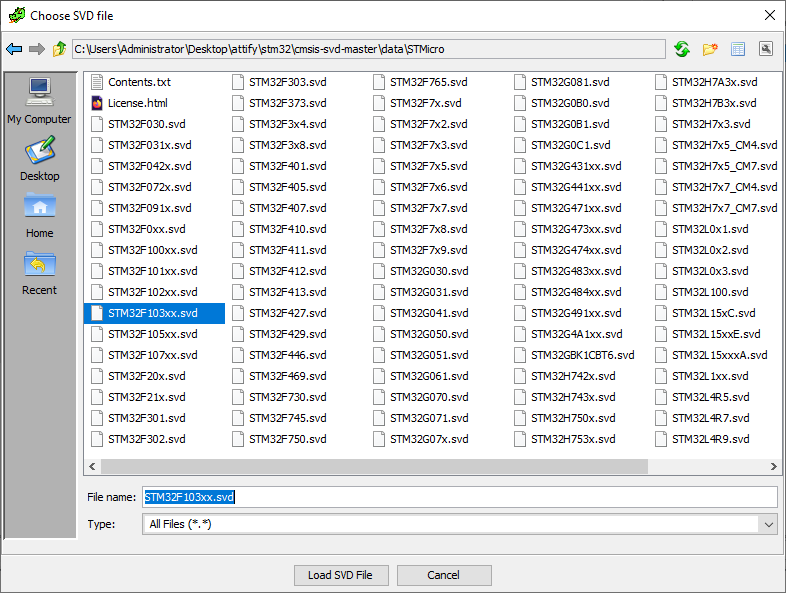
The plugin would prompt to specify the path to a SVD file to parse. We can select the STM32F103xx.svd file downloaded from the cmsis-svd repository and click on "Load SVD File".
After SVD-Loader has finished importing we can go to the memory map window.
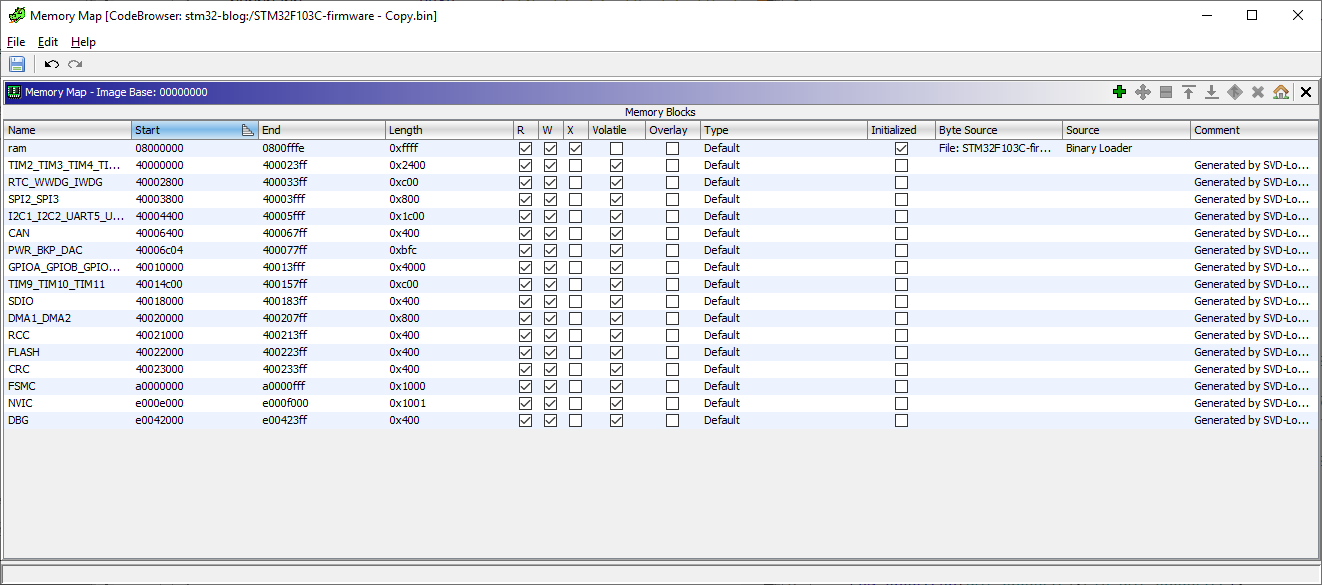
SVD-Loader has automatically created the memory blocks and peripherals by parsing the SVD. However it's worthwhile to note that the plugin didn’t create the SRAM memory block at 0x20000000. We can create the SRAM block manually. At this point we can run Ghidra auto-analysis with the default options from Analysis -> Auto analyze.
Next we can go to 080007ee to cross-check the decompiled code of the password checking logic.
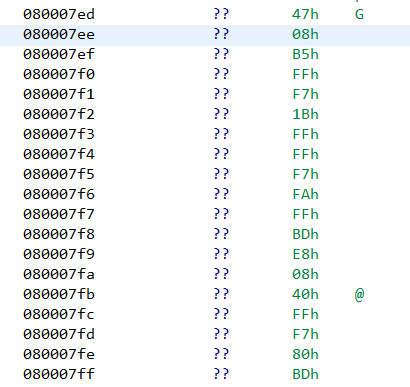
Unfortunately Ghidra wasn’t able to identify the function on its own. In such cases we can manually define a function by right clicking at that address -> Disassemble. Doing so, Ghidra creates a function at that address with the same decompiled code as before.

Final Words
In this post, we have seen how to analyze a bare metal firmware in Ghidra. A bare metal firmware is just a binary blob. To correctly analyze such a file we need to specify the load address and create the memory segments. Information about the load address and memory segments can be found in the datasheet and compiler header files. The memory map can also be automatically created using SVD-Loader by parsing SVD files. However SVD-Loader may not create all segments. SVD-Loader will only create segments that are defined in the SVD file. Thus it’s important to always cross-check with the datasheet to ensure correctness.