Introduction
In this post, we will be describing the bootloader that goes by the name of Das U-Boot. We will delve into the following Das U-Boot features, including:
- Das U-Boot Origin Story
- The Building of Das U-Boot
- Running Das U-Boot in an emulator (QEMU)
- Das U-Boot command line
- Attacker Options
U-Boot Origin Story
This open-source project first sprang into existence as a bootloader for the embedded PowerPC architecture. In this guise, it was initially known as 8xxROM and was later renamed to PPCBoot. Interestingly enough, the latter name, 'PPCBoot', was chosen somewhat based on the SourceForge restriction of digits being used in a project's name. PPCBoot's initial release was July 19, 2000. Further development saw a brief port of the bootloader to include ARM architecture through a project known as ARMBoot in 2002, with the end result being a merge back into PPCBoot in the same year. This collaboration saw the widening of the supported architectures. Later PPCBoot became U-Boot and was further widened to include x86 and MIPS architectures and by 2004 included support for 216 board manufacturers.
Fast-forwarding to the current day, U-Boot was renamed 'Das U-Boot' where 'Das' is the Germanic definitive article or simply 'The' translated into English. The name was cleverly chosen as a play on words based around the German submarine film 'Das Boot', which takes place in World War II on a German U-Boat.
The Building of Das U-Boot
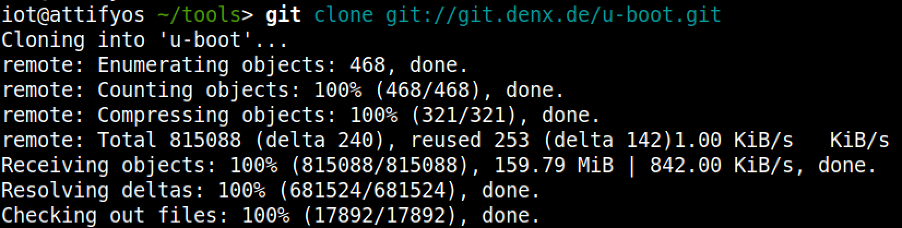
To build U-Boot, the first requirement is to obtain the source code. This can be achieved in numerous ways, however, we like the cloning of the .git archive as our preferred method:
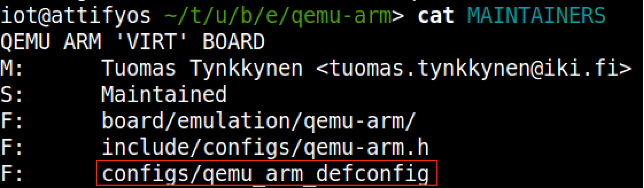
For the purposes of our discussion and subsequent practical examples, we will choose to build U-Boot across an emulated environment that is using qemu-arm. To gather our bearings, we can conduct a quick grep through the board directory to gather our bearings to find an appropriate configuration file.

With the above clue on hand, we can then further the search through examination of the MAINTAINERS file within the same directory, which leads us to the crown jewels, that is, the appropriate 'defconfig' file that we will use for our build.
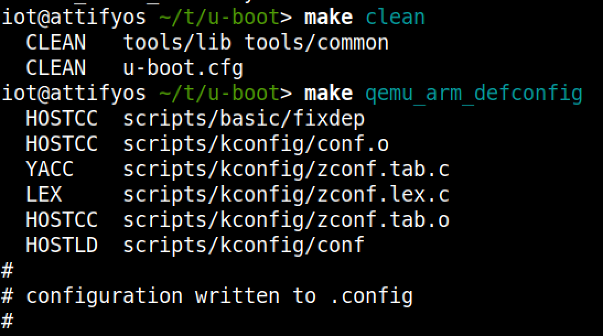
Using 'make clean' ensures a clean build distribution and writes the required .config file later used to build the U-Boot image.
We now specify the required Cross Compiler and Architecture environment variables and before proceeding onto the make process

We should now be left with a u-boot image, which we can now execute using QEMU.

Using the following bare minimum to start the emulation

At this stage, we are presented with a QEMU virtual machine. We can switch between the emulator and the U-Boot console/prompt using a combination of keys
- ESC + 1: Pressing the Escape key and the 1 key takes us to the QEMU emulator
- ESC + 2: Pressing the Escape key and the 2 key takes us to the U-Boot prompt
- Running QEMU with the -serial pty option allows for us to interact with a scrolling buffer through a pty line.
The pty line can be accessed using a screen just like the following:

Figure 1. Esc + 1 – QEMU emulator
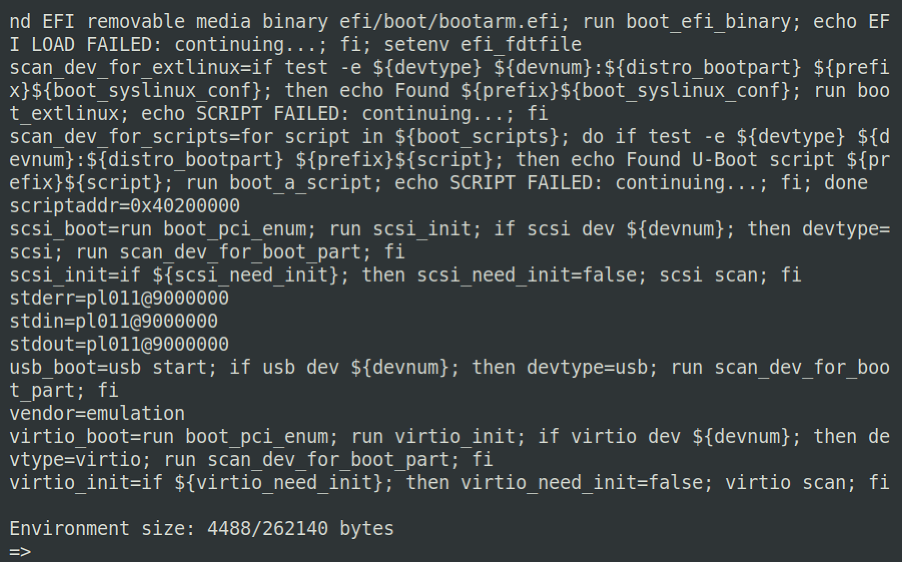
Figure 2. Esc + 2 - U-Boot prompt
Running Das-U-Boot in an Emulator (QEMU)
Up until this point, we have managed to successfully build a U-Boot image using the utilities found in the U-Boot .git repository. We shall now take a look at the U-Boot command prompt, highlighting some of the more useful commands.
You may recall from the previous blog within this series that U-Boot can be utilized for:
- The loading of new boot images into flash storage
AND
- The execution of memory and storage management tasks
The functions mentioned above can be used to further an attacker's foothold on unsuspecting hardware devices. Under the right conditions, an attacker may be able to escape the main bootloader process or alternatively be able to successfully induce a hardware glitch attack. Both of these vectors may allow for further control over the affected hardware device by allowing interaction with U-Boot itself.
Using our newly created testbed, we will now look at some useful commands, describe their functions, and how they might be leveraged to conduct other nefarious deeds.
U-Boot command line
The U-Boot command prompt is useful to an attacker as it provides a mid-way point between the initialization of a hardware device and the ultimate execution of the Linux kernel. The command prompt itself is not a fully-fledged system, however, it can be powerful in the right hands.
A good starting point is to work out the lay of the land by gathering details about the specific version of U-Boot that is running.

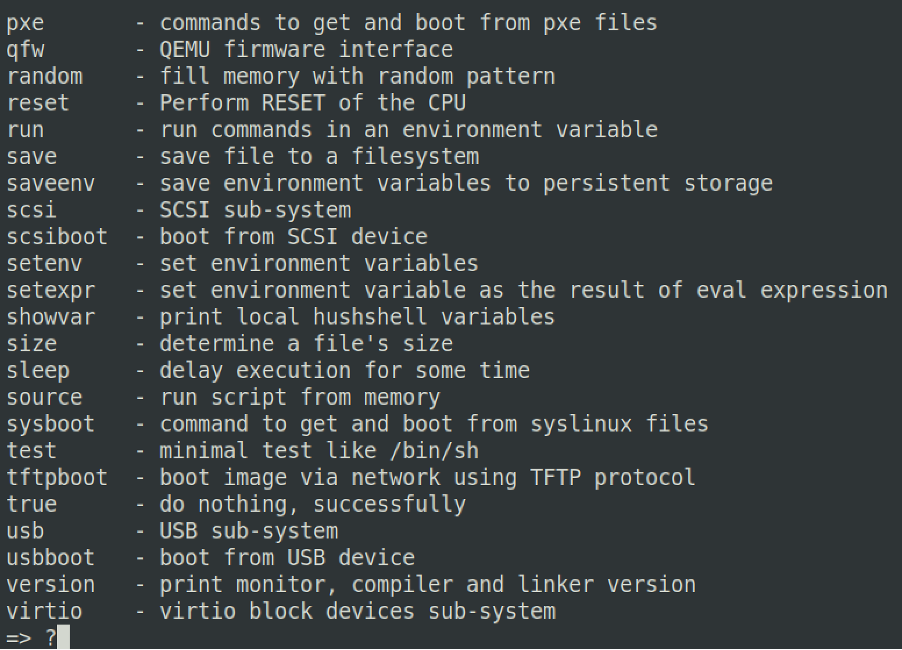
Pressing '?' will bring up a scrolling help menu, which details all the available commands U-Boot offers.
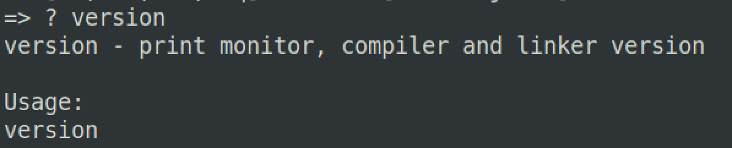
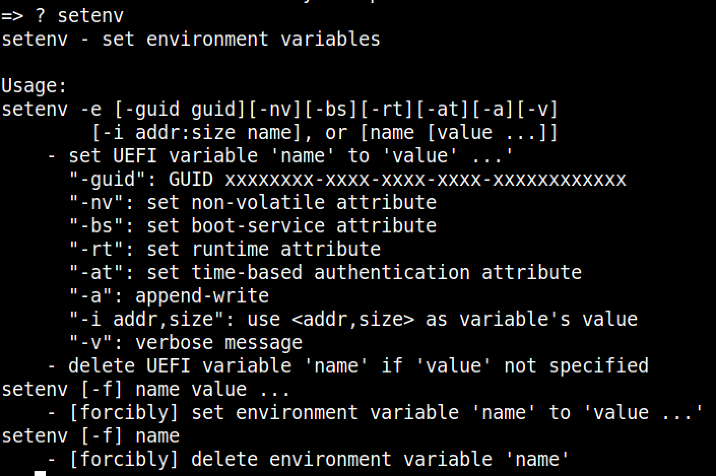
Likewise, once you have found a command that you are interested in using but do not necessarily understand its utility, you can couple ? + <command> which will provide a more detailed usage for the chosen command
A very useful command is the printenv command. This command allows us to print all of the environment variables loaded at U-Boot execution. From the output, we can see many interesting variables, some of which are:

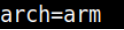
arch – describing the architecture of the underlying system. Potentially useful to understand the correct binaries and toolchains that can be used to further ongoing attacks
loadaddr – describes where the kernel image will or could be potentially loaded to and from within DRAM. Generally describes the base address and is notated in hex.

bootargs – describes the arguments that will be passed to the Linux kernel upon execution

Figure 3. console describes the TTY line and baud rate, whilst root and rootfstype describes the device where the kernel will be mounted and the file type used for the filesystem, respectively.
For changes to these variables to be made, it is possible to utilize the setenv command for this purpose.
Once an existing variable or a new one has been configured, we must ensure that this change survives a reboot. For the changes to be written to flash, we employ the use of the saveenv command.

Generally speaking, an attacker who has managed to take control of a hardware target in this fashion is most likely looking to fully leverage this newfound access by setting up the environment to suit their needs. There are various attack vectors that can be employed to fully control the affected device.
Stay tuned for Part 3 "Practical Attack Vectors"...