This is the seventh part of the Flare-On 6 CTF WriteUp Series.
7 - wopr
The challenge reads
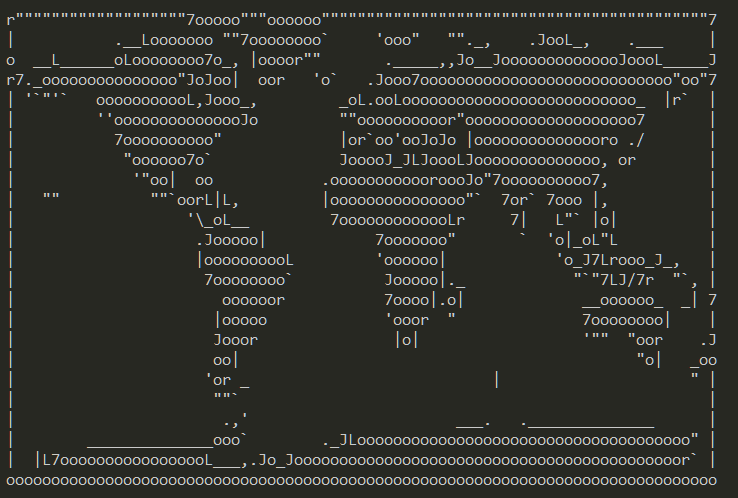
We used our own computer hacking skills to "find" this AI on a military supercomputer. It does strongly resemble the classic 1983 movie WarGames. Perhaps life imitates art? If you can find the launch codes for us, we'll let you pass to the next challenge. We promise not to start a thermonuclear war.
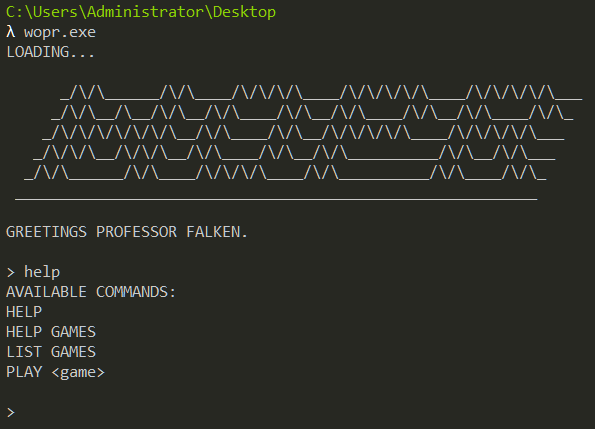
Running the provided binary wopr.exe asks for an input. Not knowing what to do we type in help and it shows a list of available commands.
Fiddling with the game commands, we can find that there are three games.
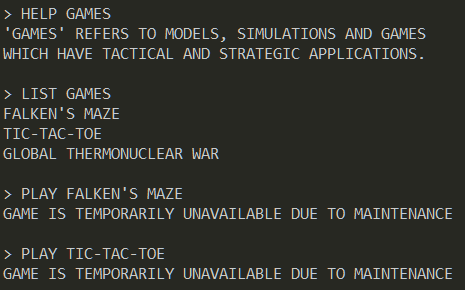
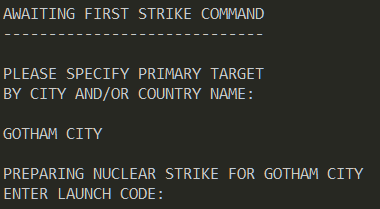
Among them the first two are unavailable. The third game "global thermonuclear war" does start but it requests a launch code.
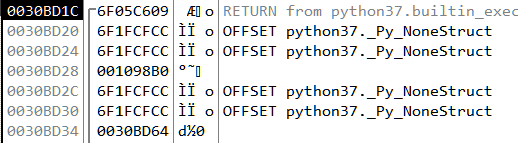
Now at this point we notice an interesting behavior. As we don't know the launch code, we press Ctrl+C to exit and immediately we notice the following as in Figure 4.
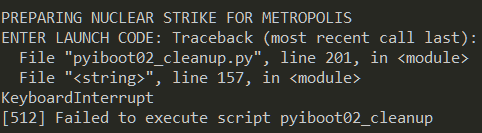
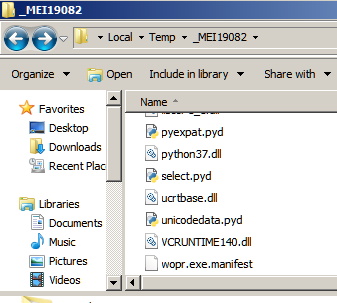
The traceback message reveals that the game was developed in Python and then converted to an exe. There are several Python to exe packagers with PyInstaller being the most common. If we look at the Windows Temp directory when the binary is running we can notice a MEI named directory with python related files as shown in Figure 5. This is exactly how PyInstaller works.
Extracting the contents
To reverse engineer PyInstaller generated binaries we need to extract its contents. We can use PyInstaller Extractor. Running the script in Python 3.7 in Ubuntu we get the following output.
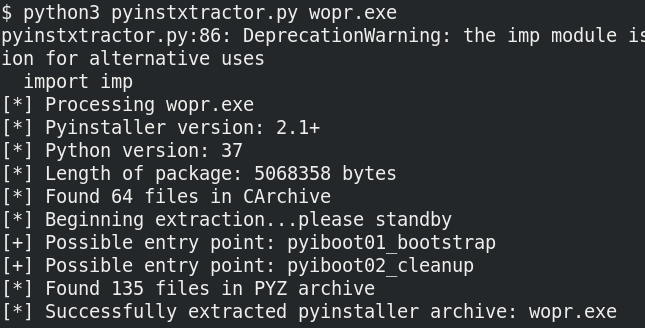
The scripts points to two possible entrypoints - pyiboot01_bootstrap and pyiboot02_cleanup. Among them the former is a PyInstaller specific script and thus not of interest. The other file is named in such a way to pass off as PyInstaller related script but a strings scan reveals the truth.
$ strings pyiboot02_cleanup | tail -n 20
pigeon
fire
__doc__
hashlibr
lzma
pkgutil
random
struct
time
ctypes
print
get_data
BOUNCEr
globalsr
getattr
setattrr#
decompress
encoder
	Exceptionr
<module>~
These pyiboot files are basically pyc files. To proceed we need to decompile it back to it's Python source. For decompiling, we will be using uncompyle6. However, we cannot directly use uncompyle6 as the pyc files have their header missing. Without the header, uncompyle6 wouldn't recognize this as a valid pyc file.
Decompiling the pyc
The format of pyc header varies across different versions of Python. For Python 3.7 the header comprises of 4 fields with a size of 4 bytes each for a total of 16 bytes. We can take any existing pyc file for Python 3.7, copy the first 16 bytes and insert it at the start of pyiboot02_cleanup. Running uncompyle6, we get back the Python source code.
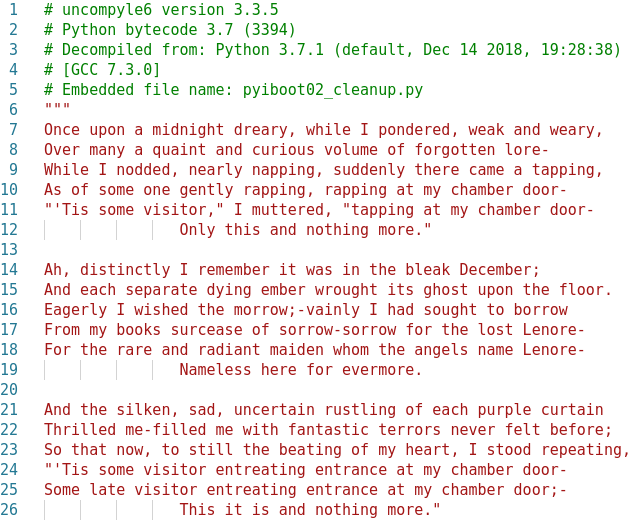
The file starts with a huge docstring which is actually taken from the poem The Raven by Edgar Allan Poe. The main code starts next as in Figure 8.
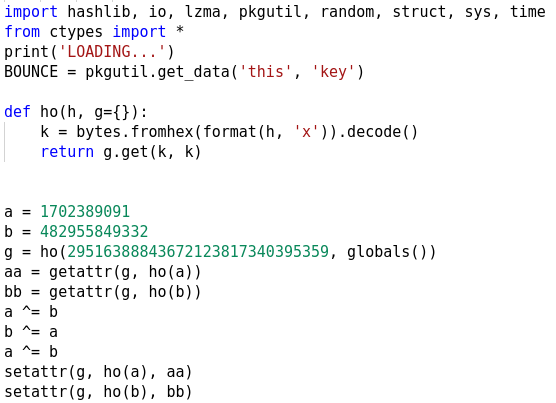
pkgutil.get_data obtains a resource from a package which in this case is the file named key which we can find within the extracted directory. It's 256 bytes in size. Next, it uses getattr and setattr to change the definitions of two builtin-in functions.
$  python
Python 2.7.15+ (default, Jul  9 2019, 16:51:35)
[GCC 7.4.0] on linux2
Type "help", "copyright", "credits" or "license" for more information.

>>> format(1702389091, 'x').decode('hex')
'exec'

>>> format(482955849332, 'x').decode('hex')
'print'

>>> format(29516388843672123817340395359, 'x').decode('hex')
'__builtins__'
As we can see, the constants are integer representations of the strings. It swaps the exec function with the print function. We need to keep this in mind as we analyze the remainder of the code.
Next we have two functions eye and fire. The fire function closely resembles with RC4 and it takes two parameters.

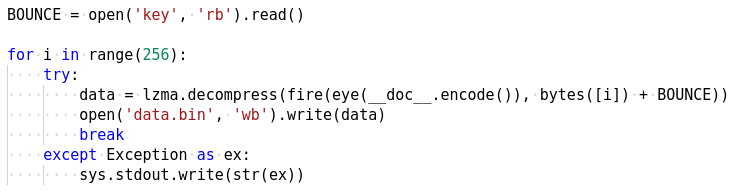
At the end we see the docstring is passed to the eye function the output of which is passed to fire followed by lzma.decompress as in Figure 10. The decompressed output is then passed to the exec function (print was swapped with exec). This happens in a loop. If an exception occurs it is simply ignored by the try...except statement.

Dumping the exec'd code
We already know that fire is the RC4 crypt function and it takes two parameters - cipher text and key. The ciphertext comes from the output of eye whereas the key is constructed from bytes([i]) + BOUNCE. Let's have a look inside the eye function.
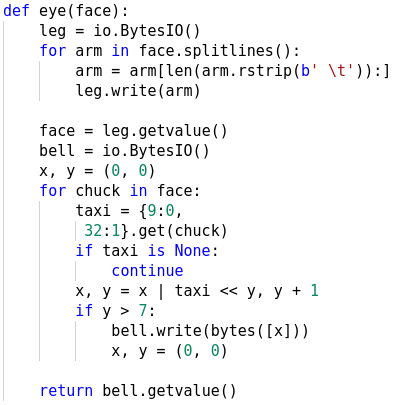
The argument passed to eye is the docstring which it parses to generate the ciphertext bit by bit. The tab (ASCII 9) and space character (ASCII 32) represents bit 0 and 1 respectively. Let's go back to the loop (Figure 10) and see if we can dump the data it's trying to exec. This looks easy at first sight. If we change the code as shown in Figure 12 we should be able to get the code its trying to exec.
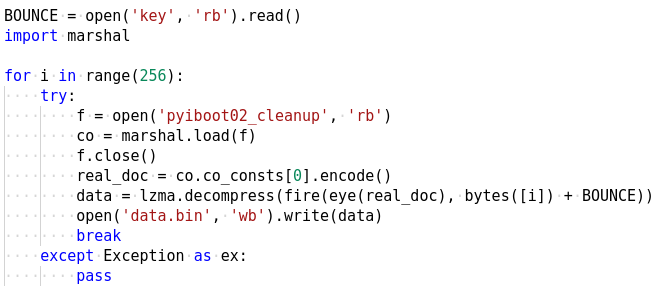
However, inspite of our efforts lzma.decompress fails in each of the 256 iterations of the loop. This indicates the data we are trying to decompress is not valid. We know that this data was constructed by the eye function by parsing the docstring. It's possible that the docstring is not correct in the first place which is the root cause for lzma to fail. Let's use the marshal module to inspect the file and check out the docstring
>>> import marshal
>>> f = open('pyiboot02_cleanup', 'rb')
>>> co = marshal.load(f)

>>> co.co_consts[0][:500]
'\nOnce upon a midnight dreary, while I pondered, weak and weary,\t\t \t\t\t  \t\t    \t \t  \t\t\t      \t\t\t\t \t\t\t\t\t\t \t\t   \t  \t\t\t \t\t   \t\t\t\t \t\t\t \t\t\t\t\t \t \t  \t \t\t \t\t \t    \t\t\t   \t\t \t    \t \t  \t\t \t      \t \t\t   \t\t \t      \t \t\t\t\t \t\t\t  \t \t  \t\t   \t\t \t \t  \t\t \t\t \t\t   \t \t \t\t\t  \t \t \t\t   \t\t\t\t    \t \t    \t\t\t   \t \t\t  \t  \t    \t\t \t\t\t  \t\t\nOver many a quaint and curious volume of forgotten lore-\t\t \t\t\t \t  \t\t\t \t \t\t\t\t\t\t\t     \t\t    \t  \t\t\t  \t \t    \t \t  \t  \t  \t \t \t\t\t\t\t\t  \t  \t \t   \t \t \t\t   \t\t \t \t\t\t \t\t \t \t \t\t  \t \t  \t\t\t     \t \t  \t  \t\t     \t\t'
As we can see, there are many spaces and tabs in between the lines. These were missing in our decompiled code which was the reason for failure. All that is now needed to do is to read the docstring from the file as shown in Figure 13.
Analyzing the flag check logic
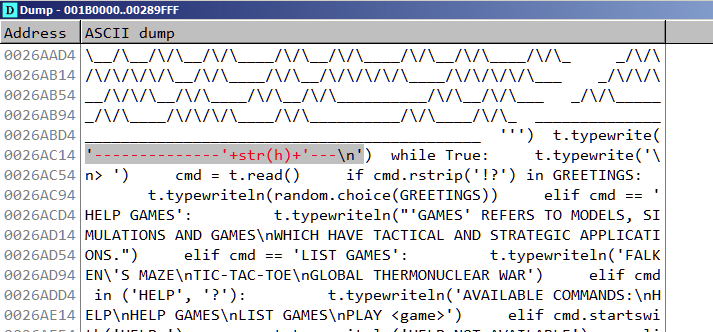
We get the exec'd data which is a Python script. This file implements the main game logic as we can see in Figure 14.
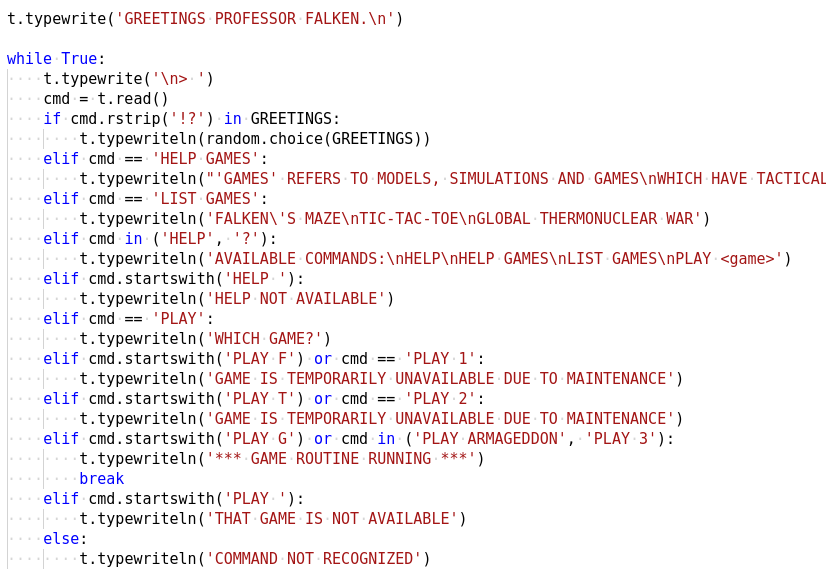
When we played the game last time, it required a launch code. At the end of the script we can see if we enter the correct launch code it would print the flag. Let us see how we can get the launch code.
The launch code is 16 characters in length which can be inferred from the code below where it left justifies the code to a string of length 16 using the NULL byte as the padding character.
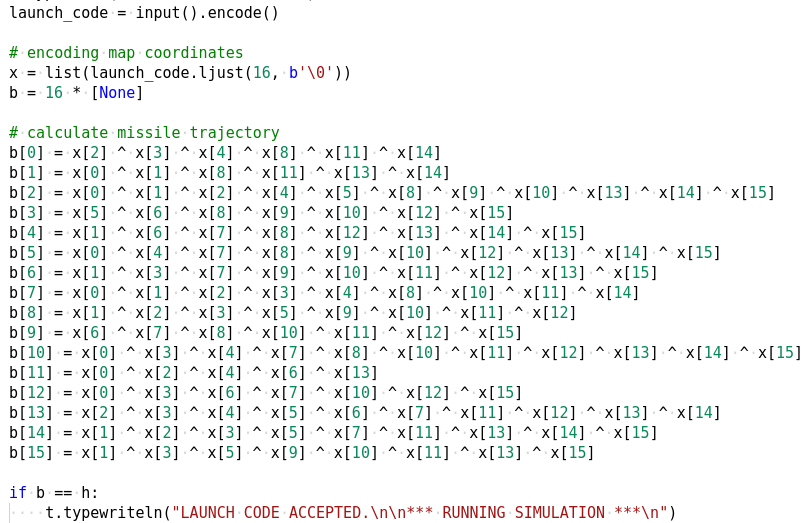
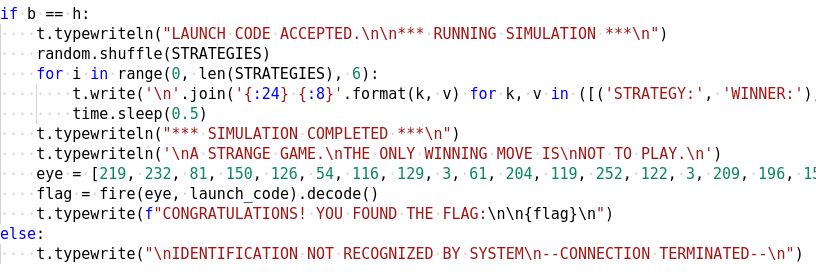
It then constructs another 16 character list by xoring various characters of the launch code. If this matches h we have the correct code. Let's see what is h.

h is another list which is generated by xoring two lists together one of which is hardcoded while the other comes from the call to a function named wrong.
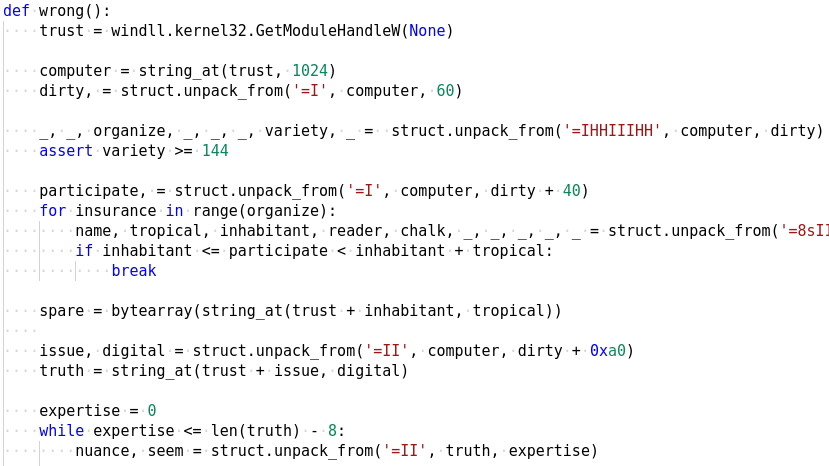
The wrong function uses ctypes to read various values from its process memory. While its possible to analyze the code and obtain the values ourselves it would be much better if we could modify the code to print out those values sparing ourselves a lot of work.
Modifying the script in memory
From Figure 10, we know that it uses exec (disguised as print) to execute the generated code after lzma. Internally the CPython interpreter implements the exec logic in the builtin_exec_impl function. The function has the following prototype
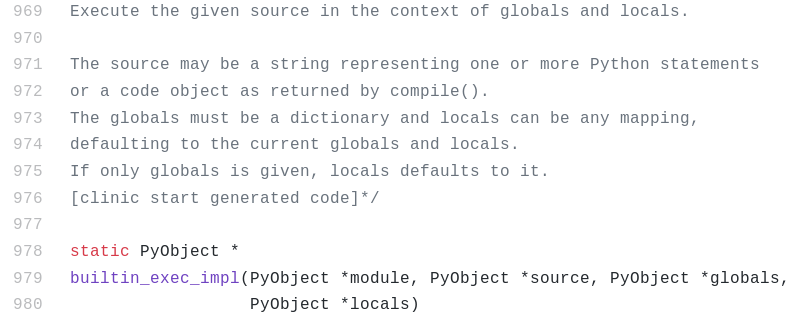
The second parameter source contains a pointer to the PyObject containing the code to exec. We need to set a breakpoint on this function so that we can patch the code before it's executed. However there is a problem. The symbolbuiltin_exec_impl is not exported by the Python DLL. We have to find another way to locate it. We can use the PDB file for Python 3.7.2 which can be found here. Alternatively we can also use string references to locate the function.
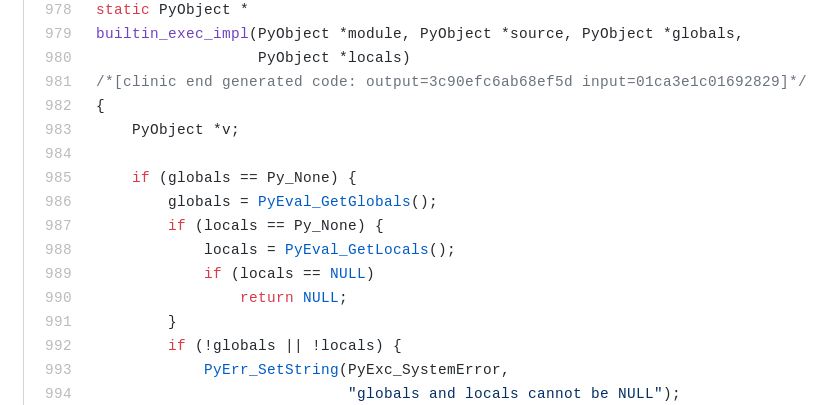
A few lines below we can see it references the string "globals and locals cannot be NULL". We can use this to locate the function.
There's another tidbit about PyInstaller which we need to be aware about. Every PyInstaller generated executable creates two processes when it runs. The initial parent process spawns a child process which executes the main program. When the child process has exited, the parent process cleans up the extracted files in the Temp directory and then quits.
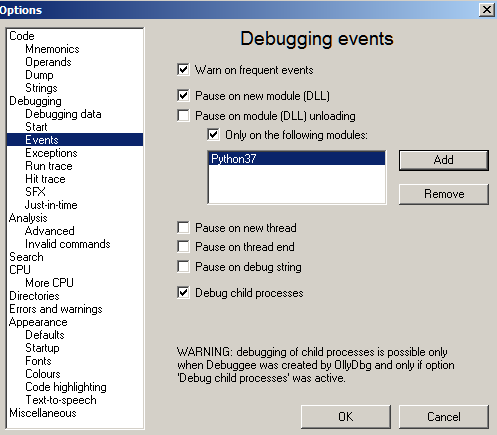
Debug the binary in OllyDbg v2. We use OllyDby v2 and not x64dbg since the former supports auto debugging child processes out-of-the-box. Ensure that "Debug Child Process" option is checked in Options. Also tick "Pause on new module (DLL)" as shown in Figure 21.
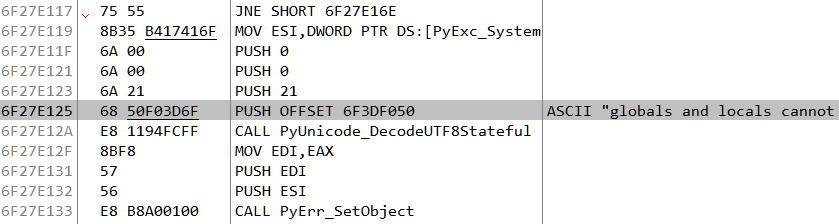
OllyDbg would automatically open a new instance when the child process is created. Wait for Python37.dll to load in the child process. When it does, search for our string and locate the corresponding piece of code which reference it.
From here, go above and set a breakpoint at the start of the function. Continue running till the breakpoint hits and the stack looks like Figure 23.
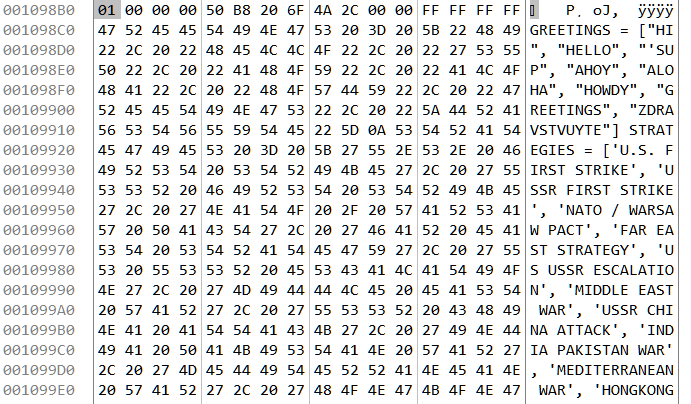
If we follow the value 1098B0 in dump we can locate our script which we want to patch.
From here we can replace any non-essential statement to print out the value of h. Here we change the line t.typewrite('GREETINGS PROFESSOR FALKEN.\n') to t.typewrite('--------------'+str(h)+'---\n') as in Figure 25.
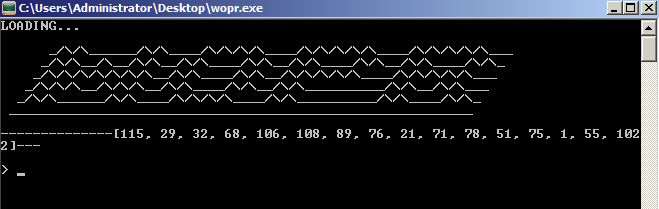
Resuming the process we notice it prints the contents of h on the console.
Calculating the flag
With the contents of h known, we can leverage the python bindings of Z3 to solve the equations and get the launch code.
#!/usr/bin/env python2
from z3 import *

h = [115, 29, 32, 68, 106, 108, 89, 76, 21, 71, 78, 51, 75, 1, 55, 102, 2]
x = [BitVec('x{}'.format(i), 8) for i in range(16)]
s = Solver()

s.add(h[0] == (x[2] ^ x[3] ^ x[4] ^ x[8] ^ x[11] ^ x[14]))
s.add(h[1] == (x[0] ^ x[1] ^ x[8] ^ x[11] ^ x[13] ^ x[14]))
s.add(h[2] == (x[0] ^ x[1] ^ x[2] ^ x[4] ^ x[5] ^ x[8] ^ x[9] ^ x[10] ^ x[13] ^ x[14] ^ x[15]))
s.add(h[3] == (x[5] ^ x[6] ^ x[8] ^ x[9] ^ x[10] ^ x[12] ^ x[15]))
s.add(h[4] == (x[1] ^ x[6] ^ x[7] ^ x[8] ^ x[12] ^ x[13] ^ x[14] ^ x[15]))
s.add(h[5] == (x[0] ^ x[4] ^ x[7] ^ x[8] ^ x[9] ^ x[10] ^ x[12] ^ x[13] ^ x[14] ^ x[15]))
s.add(h[6] == (x[1] ^ x[3] ^ x[7] ^ x[9] ^ x[10] ^ x[11] ^ x[12] ^ x[13] ^ x[15]))
s.add(h[7] == (x[0] ^ x[1] ^ x[2] ^ x[3] ^ x[4] ^ x[8] ^ x[10] ^ x[11] ^ x[14]))
s.add(h[8] == (x[1] ^ x[2] ^ x[3] ^ x[5] ^ x[9] ^ x[10] ^ x[11] ^ x[12]))
s.add(h[9] == (x[6] ^ x[7] ^ x[8] ^ x[10] ^ x[11] ^ x[12] ^ x[15]))
s.add(h[10] == (x[0] ^ x[3] ^ x[4] ^ x[7] ^ x[8] ^ x[10] ^ x[11] ^ x[12] ^ x[13] ^ x[14] ^ x[15]))
s.add(h[11] == (x[0] ^ x[2] ^ x[4] ^ x[6] ^ x[13]))
s.add(h[12] == (x[0] ^ x[3] ^ x[6] ^ x[7] ^ x[10] ^ x[12] ^ x[15]))
s.add(h[13] == (x[2] ^ x[3] ^ x[4] ^ x[5] ^ x[6] ^ x[7] ^ x[11] ^ x[12] ^ x[13] ^ x[14]))
s.add(h[14] == (x[1] ^ x[2] ^ x[3] ^ x[5] ^ x[7] ^ x[11] ^ x[13] ^ x[14] ^ x[15]))
s.add(h[15] == (x[1] ^ x[3] ^ x[5] ^ x[9] ^ x[10] ^ x[11] ^ x[13] ^ x[15]))


if s.check() == sat:
  launch_code = ''
  m = s.model()
  for i in x:
    launch_code += chr(m[i].as_long())

  print launch_code
The above script calculates the launch code which comes out to 5C0G7TY2LWI2YXMB.
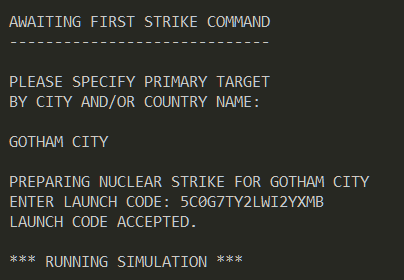
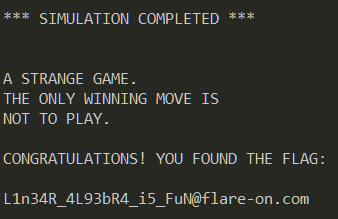
Our calculated launch code is accepted following which it shows the flag.

)
)
)
)