Flare-On is a CTF challenge organized by the FLARE team at FireEye Labs. The challenges are reverse engineering based. This year there are a total of 12 challenges with increasing difficulty covering diverse areas from Windows and Linux to Android all the way to working with Arduino.
As security professionals, we at Attify are always looking forward to take part in such challenges to enhance our skillset and also to learn something new. Without further ado here are the write-ups for the challenges.
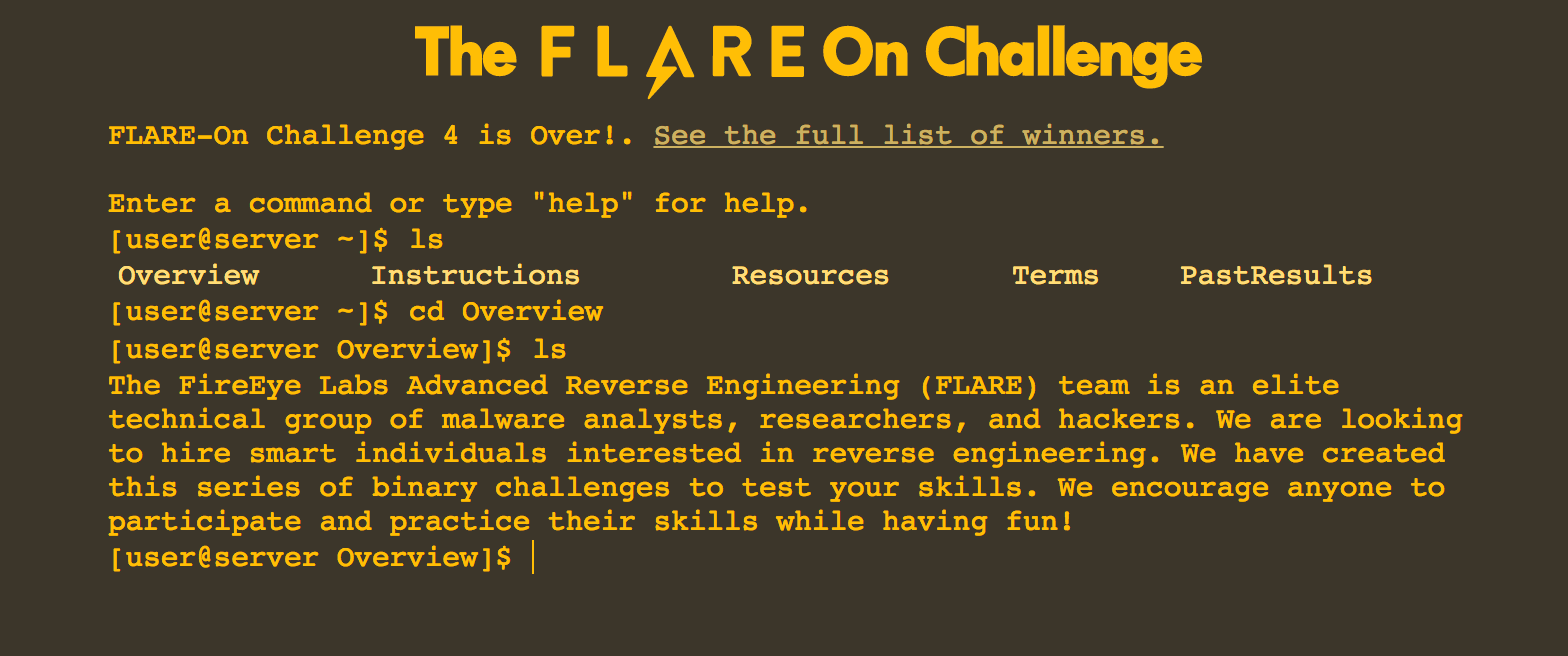
#1 – Login.html
The first challenge is an HTML file – login.html . It’s a form comprising of a textbox and a button. It’s as simple as it gets – provide a flag and check for correctness.

Let’s have a look at the source.
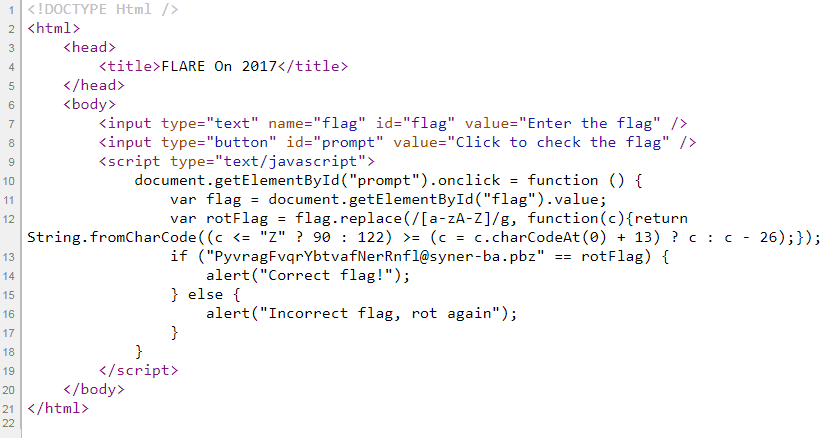
An onclick handler has been assigned to the button which checks for the correctness of the flag. The name of the variable rotFlag is enough to determine what the piece of the code is doing. It’s encoding our input text using the ROT-13 substitution cipher. To succeed the encoded text must match the hardcoded string "PyvragFvqrYbtvafNerRnfl@syner-ba.pbz".
To get back our flag, all we need to do is reapply ROT-13 on encoded text.

The flag for this level is ClientSideLoginsAreEasy@flare-on.com. Not bad for the introductory challenge.
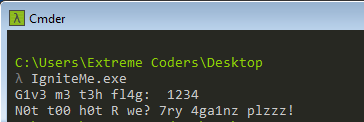
#2 – IgniteMe.exe
The challenge reads “You solved that last one really quickly! Have you ever tried to reverse engineer a compiled x86 binary? Let’s see if you are still as quick.”
We take this as a challenge. The file for this level is a console Windows PE (Portable Executable) having a IgniteMe. Providing the wrong flag a “bad boy” message is printed.
Let’s try to debug the app in x64dbg. Loading it, the debugger pauses at the program entrypoint. In case the linear disassembly listing is difficult to comprehend, x64dbg can also display the disassembly in a graphical form. We can go to the graph view by pressing G.

At 4011E9 the program calls kernel32.WriteFile to print the initial message. Next, there are calls to two functions sub_4010F0 and sub_401050, and based on the return value of the latter decides to print the success or the failure message. The success message is located at the left block starting at 401218 whereas the failure message is located at the right block at an address 4011FD.
Lets, inspect the first function sub_4010F0. It accepts a string using kernel32.ReadFile. The flag is stored on a stack allocated buffer at [ebp-110]

A bit down in the disassembly listing, our input string is copied to another location at 403078 after filtering out CR & LF characters.
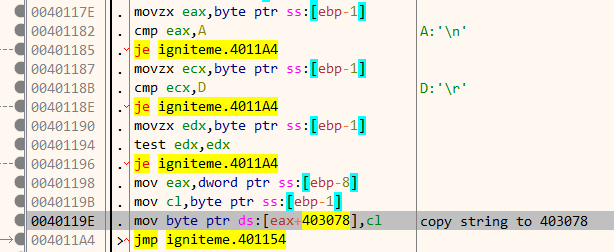
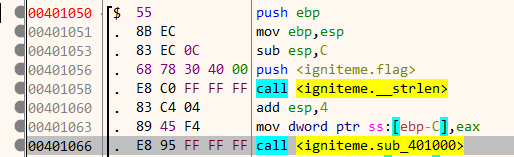
We can rename address 403078 as flag for better understanding. Our next point of interest is function sub_401050. At the start of this function, there is a call to a sub_401000 with the length of the string is stored in [ebp-C].
sub_401000 is very simple and is composed of a few instructions.
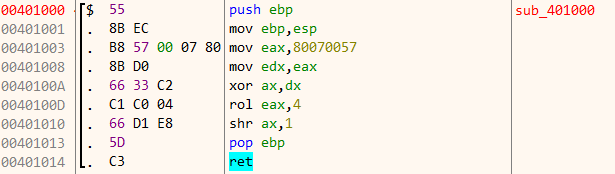
In pseudocode, the function performs the following calculation.
eax = 0x80070057 edx = eax eax[16:31] ^= edx[16:31] eax = RotateLeft(eax, 4) eax[16:31] >>= 1
The result if the above calculation is constant and equal to 0x700004. Coming back to the previous function, we can see the last byte of register eax i.e al is stored in [ebp-1] . Since eax contains 0x700004, al has a value of 4.
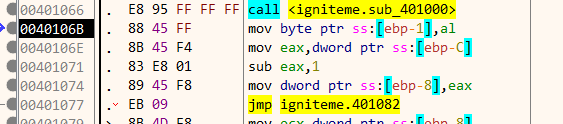
Next, the characters of the string are iterated in reverse order, xoring it in each loop.
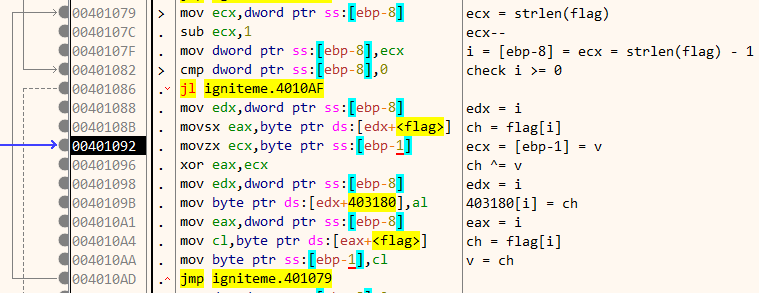
We can represent the calculation in the following pseudocode.
v = 4; for (i = strlen(flag)-1; i>=0; i--) { ch = flag[i]; ch ^= v; array_403180[i] = ch; v = ch; }
Each character of our input starting from the right is XORed and the result is stored in an array at 403180. Finally, near the end of the function, the array at 403180 is compared byte by byte to another array at 403000.
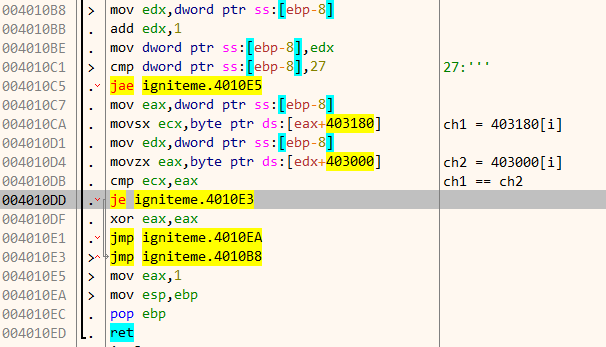
If both the array matches, the function returns 1 in eax and our flag is correct. Navigate to 403000 we can find the contents of the array. Note that only 0x27 bytes are compared.
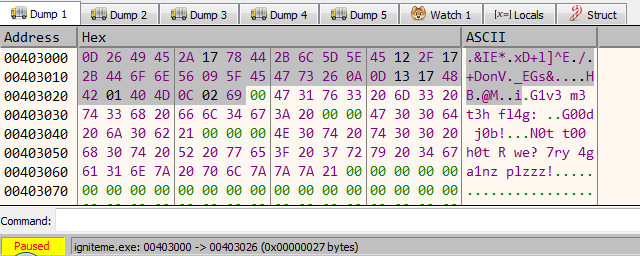
With the above information, we can compute the flag using a python script.
target = [13, 38, 73, 69, 42, 23, 120, 68, 43, 108, 93, 94, 69, 18, 47, 23, 43, 68, 111, 110, 86, 9, 95, 69, 71, 115, 38, 10, 13, 19, 23, 72, 66, 1, 64, 77, 12, 2, 105] flag = [] v = 4 for x in reversed(target): v = x ^ v flag.append(v) print ''.join(reversed(map(chr, flag)))
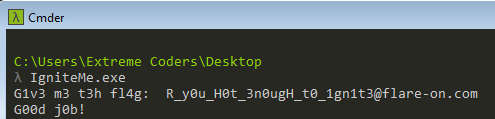
Running the script, we get the flag R_y0u_H0t_3n0ugH_t0_1gn1t3@flare-on.com.
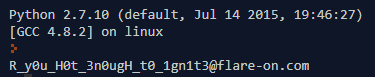
Feeding this to the program we get the much-coveted success message!
#3 – greek_to_me.exe
The challenge begins with an interesting note “Now that we see you have some skill in reverse engineering computer software, the FLARE team has decided that you should be tested to determine the extent of your abilities. You will most likely not finish, but take pride in the few points you may manage to earn yourself along the way.”
The binary for this level is again a Windows executable weighing just 2KiB. There is no visible output on running the program.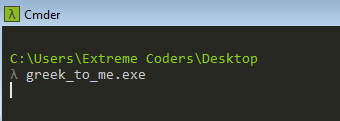
Time for digging deep. Lets load this in x64dbg as before.

At the program entry point there’s a call to sub_401008 which in turn calls sub_401121 .
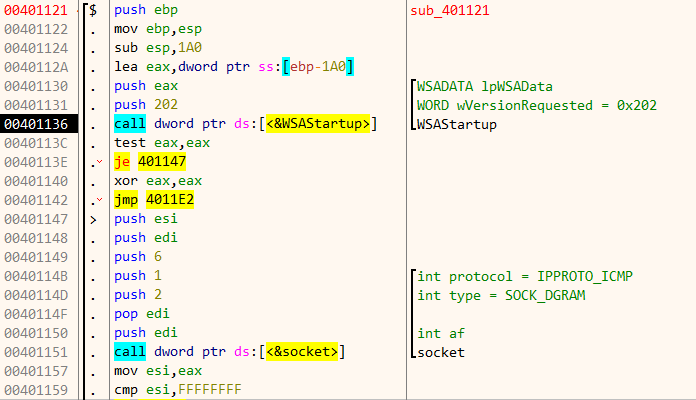
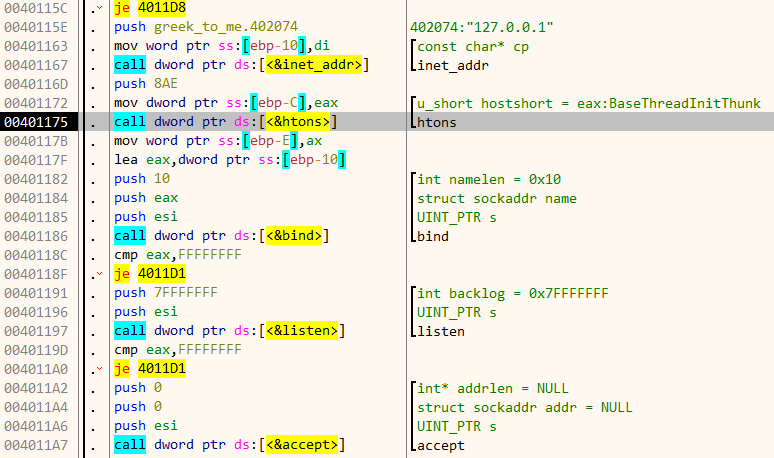
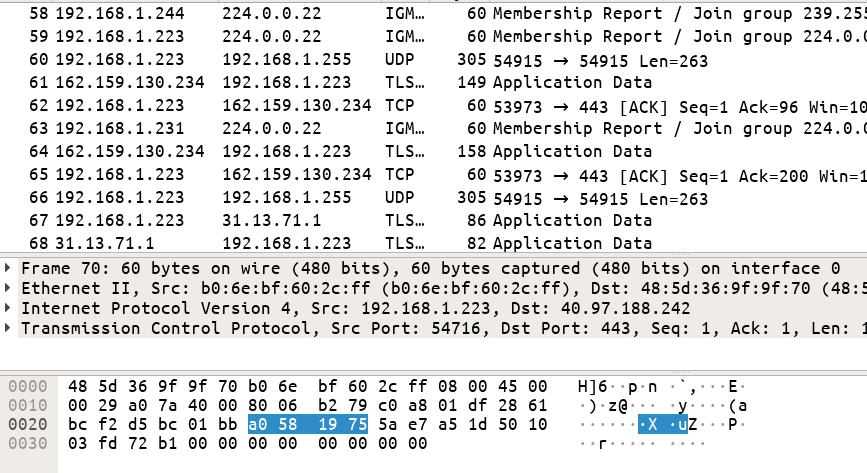
The code loads the Winsock library. Then it proceeds to create a datagram socket. To detailed descriptions about the parameters passed to the Winapi functions, I have used the xAnalyzer plugin. It binds itself on port 2222 (0x8AE) to listen for incoming connections.
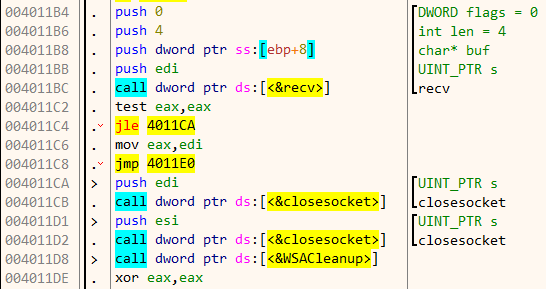
On accepting a connection, it calls recv to read 4 bytes which are stored at [ebp + 8] . If we provide less than 4 bytes it closes the socket immediately.
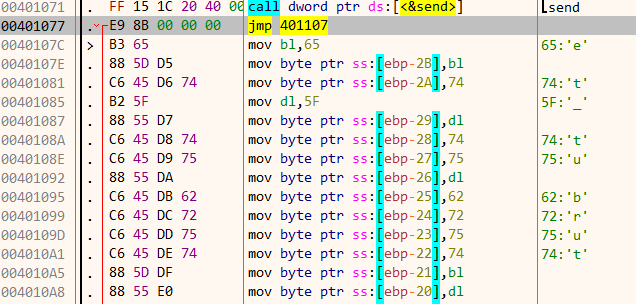
Back in the parent function, it takes the least significant byte of our input and uses it to XOR 0x79 bytes of data starting from 0x40107C. During each round, it also adds 0x22 to the result.
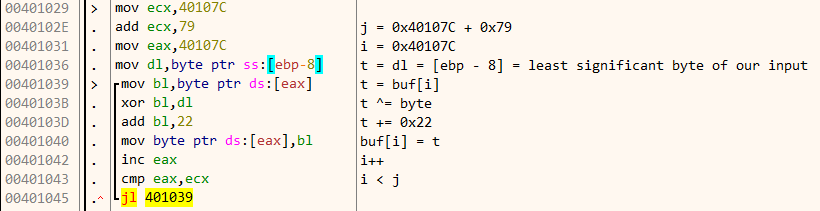
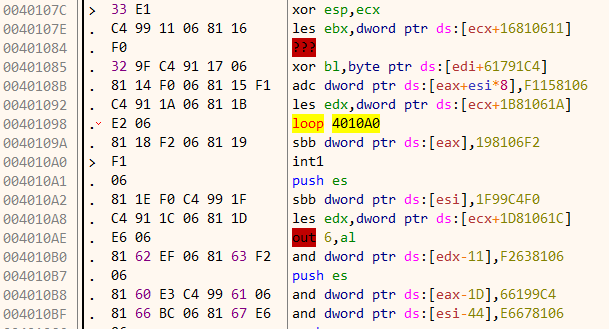
If we navigate to 0x40107C we can see that the data which it’s XORing is a part of the code itself. This is a perfect example of self modifying code.
Thus the objective of the challenge is to provide the correct key to decrypt the data successfully. After xoring the data with our key, it calculates a hash on the newly decrypted buffer. For correct decryption, the hash must match 0xFB5E.
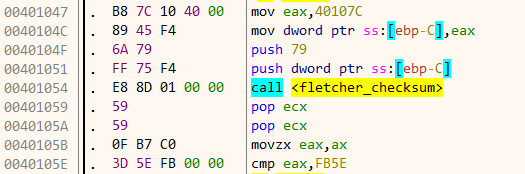
The hashing algorithm used is Fletcher’s checksum. The number of possible keys is only 256 as only a single byte in a 32 bit integer are considered. With such a small keyspace we can go for a brute force approach.
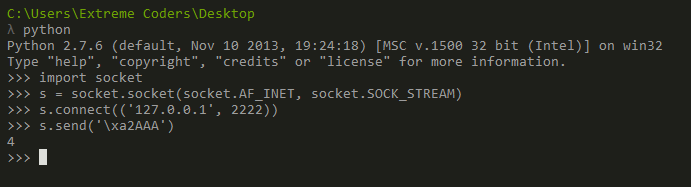
import socket import os import time for i in xrange(1, 255): os.system('start greek_to_me.exe') time.sleep(0.1) print '[+] Trying key,', hex(i) key = chr(i) + 'AAA' s = socket.socket(socket.AF_INET, socket.SOCK_STREAM) s.connect(('127.0.0.1', 2222)) s.send(key) result = s.recv(512) if 'Nope' not in result: print '[+] Found key', hex(i) print result break s.close()
Note that while brute forcing we are only changing the first byte of the key and not the last byte. This is because of endianess. The most significant byte of the key which we are sending becomes the least significant byte when considered as a 32 bit integer value.
Running the brute forcer script we get the correct key 0xA2.
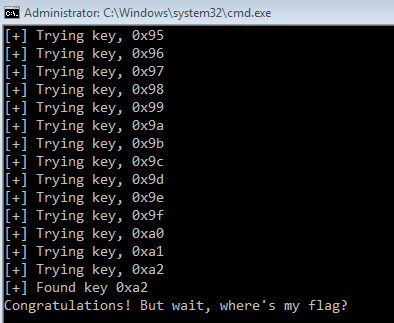
Just as the program says, we have indeed found the key but where is the flag? Lets see how the program runs with the correct key. Start the program in x64dbg and send the correct flag through the socket.
This time we can notice the buffer at 0x40107C is decrypted correctly. A part of the flag is already visible in the comments section.
Stepping over the instructions we can get the full flag in the memory dump window as shown.
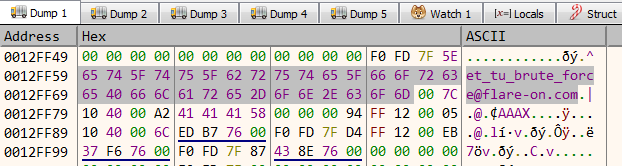
The flag for this level is et_tu_brute_force@flare-on.com. We did solve it using brute force just as the challenge authors have expected.
#4 – notepad.exe
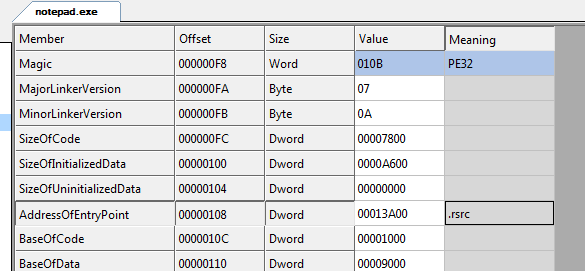
Our fourth challenge is a Windows executable named notepad.exe. A cursory look in CFF Explorer suggests that the binary is indeed the standard notepad executable shipped with Windows. The entrypoint of the executable is located in the .rsrc (resource section) which is not the case with the standard notepad binary.
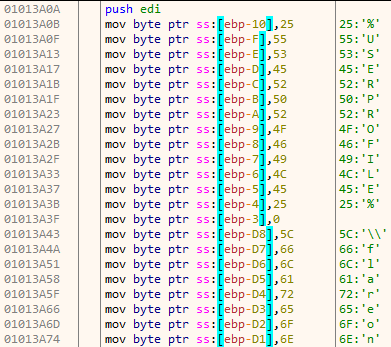
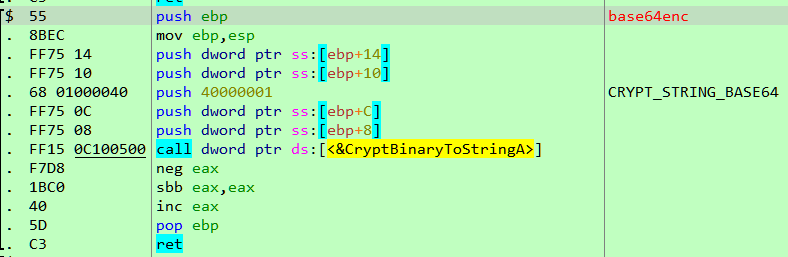
Opening the binary in x64dbg reveals an interesting pattern. The string used by the program are constructed at runtime on the stack. The advantage of using this approach is running a string scanner on the binary yields no useful information. Normally, one would expect to find the static strings in the .rodata section.
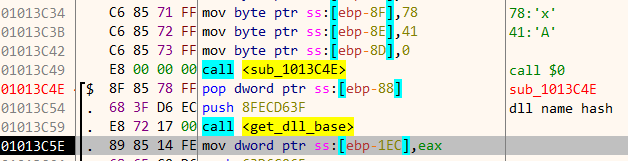
After constructing the necessary string, it obtains the base address of kernel32.dll. The function get_dll_base takes a single argument – the hash of name of the dll. In the following image, 8fecd63f is the hash value for the name kernel32.dll.
The purpose of get_dll_base is same as to that of the Winapi function GetModuleHandle. Internally, get_dll_base works by parsing the loaded modules linked list in the Process Environment Block (PEB). The names of the loaded modules are hashed and compared to find the correct dll.

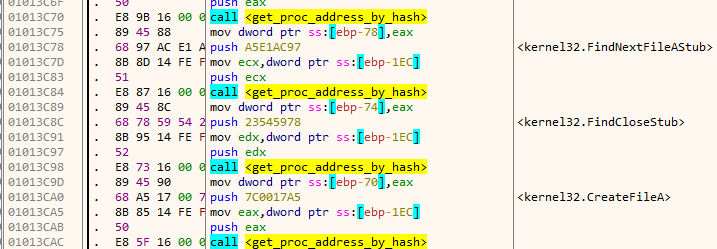
Similar to get_dll_base we also have a function get_proc_address_by_hash which as its name suggests is similar to the Winapi function GetProcAddress, the difference being that it resolves the address by a hash value rather than by the name.
Next, it obtains the path of the user directory by expanding the environment variable %USERPROFILE% using ExpandEnvironmentStrings. The path so obtained is concatenated with the string “flareon2016challenge”. On my machine, the resultant path is as shown in the image below.

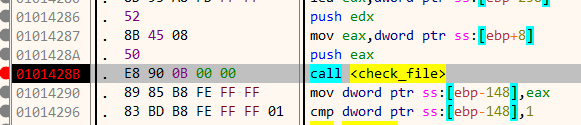
The path is passed as an argument to a function which I have named as scan_dir. This function iterates over all the files in the above directory using FindFirstFile. Each of the file names thus obtained is passed on to a second function named check_file.
Function check_file opens and maps the file in its address space. This is done using CreateFile and CreateFile, CreateFileMapping and MapViewOfFile. After mapping the file in its address space, the first two bytes are compared to MZ which is the magic signature for Windows executables. Similarly it also checks that the bytes at an offset 0f 0x3c must be PE. This is the signature of the PE header.
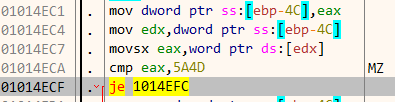

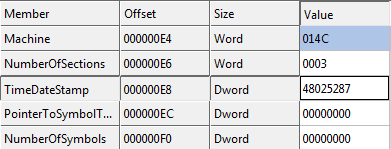
At this point we know that it’s searching for PE files. Going further down in the disassembly listing, there is a call to a function located at 1014C60 which I have named as check_timestamps. The PE header contains a field TimeDateStamp which stores the time when this particular file was compiled. We can view this field in CFF Explorer. For the file notepad.exe it contains 4802587 as shown below.
The function check_timestamps parses the PE header and compares this value to some other hard coded value. It checks the timestamp value of itself as well as the exe file which it loaded.
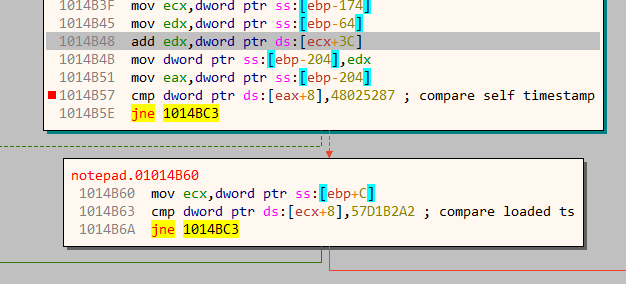
This is rather strange. It implies the exe file which its loading must have a timestamp of 57D1B2A2. If the check succeeds, it takes the right branch and a displays a message box.
Similarly, going down there are checks for three more timestamps – 57D2B0F8, 49180192 and 579E9100. At this point I was not quite sure about the intentions of the challenge author. All we know is that we should provide four PE files with the corresponding timestamps. On the first try, searching on Google for those values yielded no positive result. However, when prefixing them with 0x let the cat out of the bag.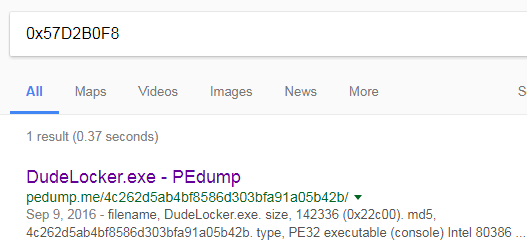
We have a solitary hit! DudeLocker.exe was one of the FlareOn challenges last year. Similarly searching for 0x579E9100 points to unknown, the 4th problem of 2016. “flareon2016challenge” is the name of the directory where it scans for these. All of this strongly indicates that this challenge has something to do with the previous year.
Our intuition is indeed correct, the remaining two timestamp values are that of the first and third problem of 2016. We have completed the first part of the problem. After copying those files to the proper directory and launching the application a file key.bin gets created, but it doesn’t have a key within.

Time to dig deeper. Going back to the disassembly listing reveals the reason. The program compares the timestamps in groups of two.
[su_table]
| # | Self timestamp | Loaded file timestamp |
|---|---|---|
| 1 | 0x48025287 | 0x57D1B2A2 |
| 2 | 0x57D1B2A2 | 0x57D2B0F8 |
| 3 | 0x57D2B0F8 | 0x49180192 |
| 4 | 0x49180192 | 0x579E9100 |
| 5 | 0x579E9100 | – |
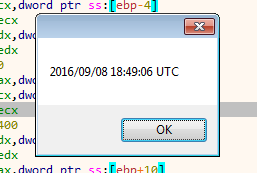
If the challenge binary has a timestamp of 0x48025287 the loaded PE file must have a timestamp of 0x57D1B2A2 as per the previous table. We need to run the program 5 times in sequential order with the respective timestamp from the above table. For editing the timestamp values, I have used CFF Explorer. A message box is shown after the last run.
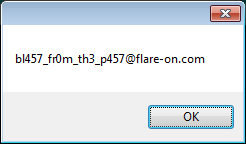
The flag for this level is bl457_fr0m_th3_p457@flare-on.com
That’s all for this post. In the next post, we will look at the further challenges and how we solved them during the CTF.
For more updates: Follow @AttifyMe

)
)
)
)