#7 – zsud.exe
The 7th one looks to be sort of a game.

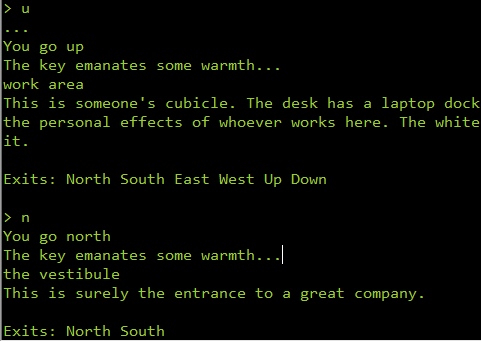
In fact, it’s a game of maze. The game supports a few commands. We can walk inside the maze in 6 possible directions – north, south, east, west, up and down. There are other commands to say, wear, get an object etc.
Initial triage
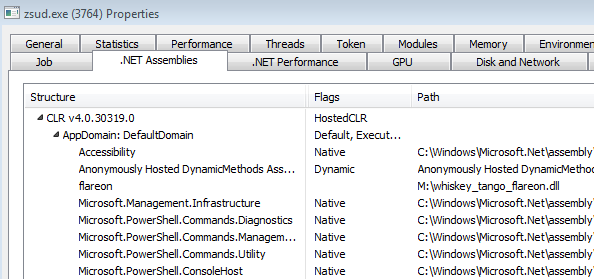
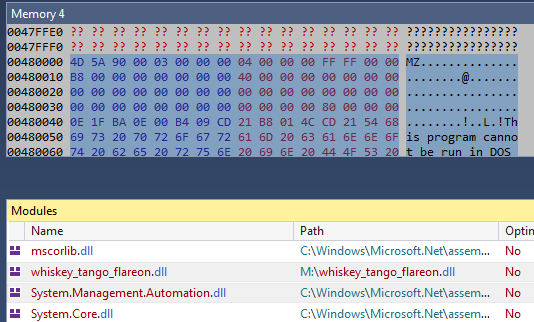
Let’s have a look at the running process in Process Hacker. The point to note is that it’s a .NET process. A .NET executable can be identified by the presence of metadata within it. However, if we open the binary in CFF Explorer, there are no signs of any such metadata. The astute reader might have noticed the HostedCLR flag in the image above. CLR Hosting in simple words means the .NET runtime is started by the started by the application rather than by the PE loader.
We can also see the presence of PowerShell in the list of loaded assemblies. Besides this, we also have an assembly named flareon loaded. Let’s use dnSpy to inspect this while it’s running. After attaching to the running zsud.exe process we can have a look at the loaded modules.

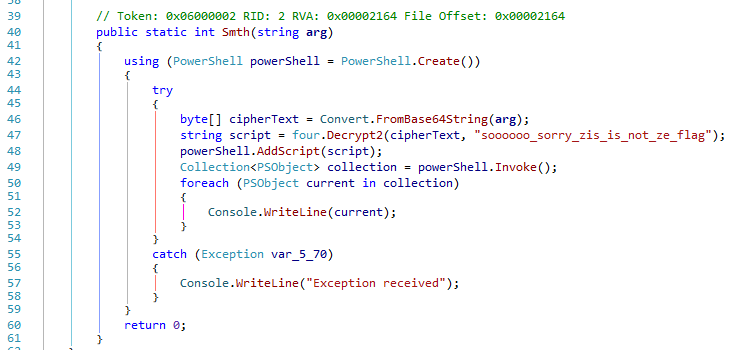
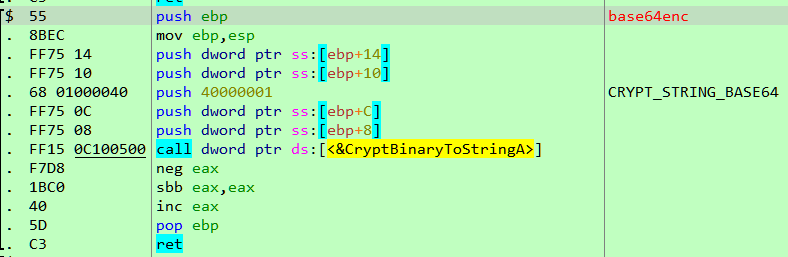
We can dump the assembly whisky_tango_flareon.dll to disk. Opening this module, we can see can see a function named Smth which decrypts a string,
Dumping the PowerShell script
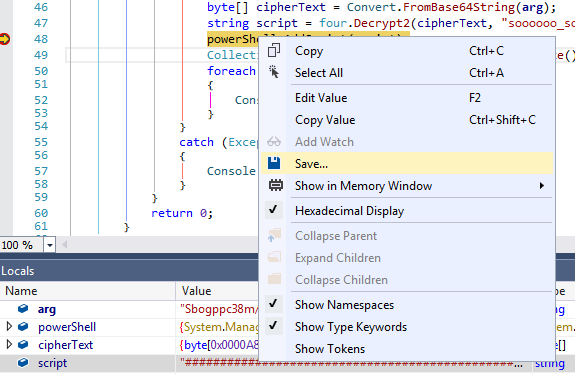
We can set a breakpoint at line 48 and rerun the program in dnSpy. When the breakpoint hits, we can save the contents of the script variable.
Analyzing the PowerShell script
The implementation of the game is in the PowerShell which is partly obfuscated. If we execute the script, we get back the original game window. Analyzing the code we can see the presence of rand and srand strings perhaps indicating this has something to do with random numbers.
Let’s have a look at the function Invoke-MoveDirection which executes a move.
function Invoke-MoveDirection($char, $room, $direction, $trailing) { $nextroom = $null $movetext = "You can't go $direction." $statechange_tristate = $null $nextroom = Get-RoomAdjoining $room $direction if ($nextroom -ne $null) { $key = Get-ThingByKeyword $char 'key' if (($key -ne $null) -and ($script:okaystopnow -eq $false)) { $dir_short = ([String]$direction[0]).ToLower() ${N} = ${sCRiPt:MSVcRt}::("{1}{0}" -f'nd','ra').Invoke()%6 if ($directions_enum[$dir_short] -eq ($n)) { $script:key_directions += $dir_short $newdesc = Invoke-XformKey $script:key_directions $key.Desc $key.Desc = $newdesc if ($newdesc.Contains("@")) { $nextroom = $script:map.StartingRoom $script:okaystopnow = $true } $statechange_tristate = $true } else { $statechange_tristate = $false } } $script:room = $nextroom $movetext = "You go $($directions_short[$direction.ToLower()])" if ($statechange_tristate -eq $true) { $movetext += "nThe key emanates some warmth..." } elseif ($statechange_tristate -eq $false) { $movetext += "nHmm..." } if ($script:autolook -eq $true) { $movetext += "n$(Get-LookText $char $script:room $trailing)" } } else { $movetext = "You can't go that way." } return "$movetext" }
Get-RoomAdjoining returns the adjacent room in the movement direction. If there is no such room, our move is invalid. Going down a random number modulo 6 is generated. This number is used as in index into directions_enum which is a dictionary mapping the 6 movement directions to numbers. If our movement direction matched with the randomly generated direction, function Invoke-XformKey would be called.
The random number generator is initialized by the Invoke-TransferThing function by a call to srand .
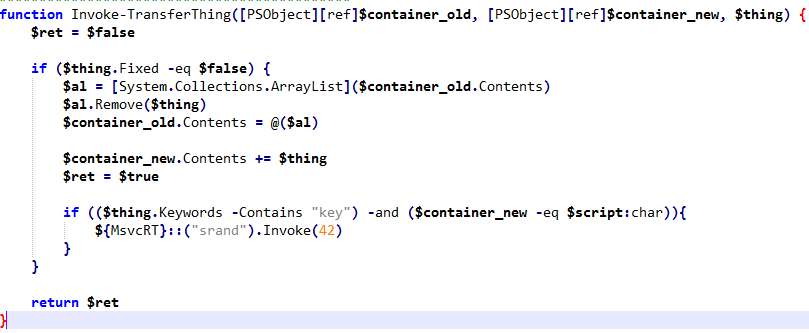
Additionally also note that we need to be in possession of a “key” for srand to be invoked.
Drawing the level map
The Get-Map function constructs the map of the maze. The New-Room function creates a new room and the rooms are linked with each other by the Add-RoomLink function.
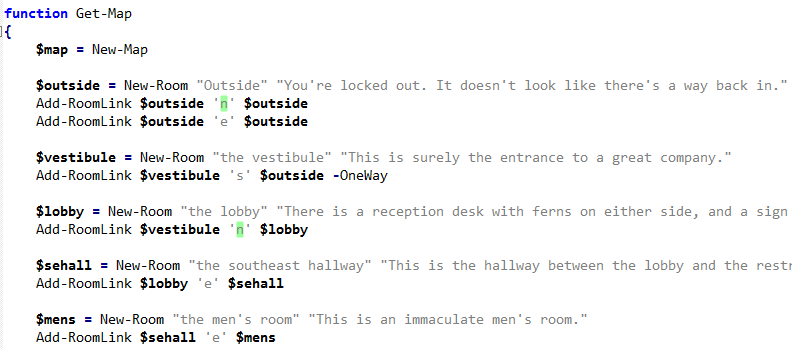
Following the code, we can sketch the floor plan as below. We will use this sketch as a guide for travelling in the maze.

The case of the random number generator
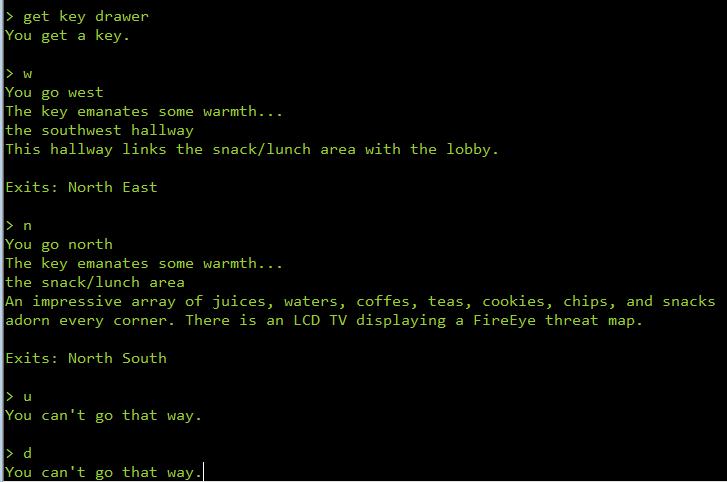
Our first objective is thus to fetch the key from the drawers of the reception table at the lobby. Doing that would invoke srand . Next, we need to move according to the random numbers generated. The question is how do we predict random numbers?
True random numbers cannot be predicted. If they can be predicted they are not random anymore. Generating truly random numbers is a very difficult task. For the majority of our purposes, we use what’s called a pseudo-random number. These numbers are generated by a deterministic algorithm based on an initial value called as a seed. Using the same seed will generate the exact same sequence of random numbers.
The PowerShell script generates pseudo-random numbers using Microsoft Visual C++ runtime library (msvcrt.dll). Lets try to generate 20 random numbers using the same seed.
import ctypes >>> msvcrt = ctypes.cdll.msvcrt >>> dir_map = ['n', 's', 'e', 'w', 'u', 'd'] >>> msvcrt.srand.restype = None >>> msvcrt.srand(42) >>> print [dir_map[msvcrt.rand()%6] for i in xrange(20)] ['w', 'n', 'u', 'd', 'u', 'e', 'n', 's', 's', 's', 'e', 'w', 'u', 'w', 'u', 's', 'w', 'u', 's', 's']
The generated numbers are mapped using the directions map. If we try to follow this path after obtaining the key from the drawer, we will notice that the path is not valid after the two moves – west and north.
Clearly, this means our generated random numbers are not the same as the ones generated by the program.
Dynamic analysis in Windbg
Let’s debug the program in Windbg. You can also use x64dbg for the same. Disassembling the srand function we can see that the very first instruction is an unconditional jump. This implies that the function is actually working differently than expected. We can also notice that it is comparing whether the seed value passed to srand is 42 (0x2a). If we recall, the PowerShell script was also using 42 as the seed value.
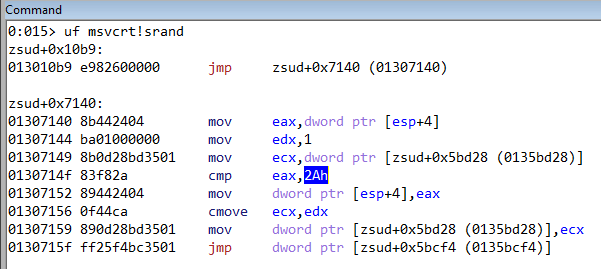
Similarly, rand is also hooked.
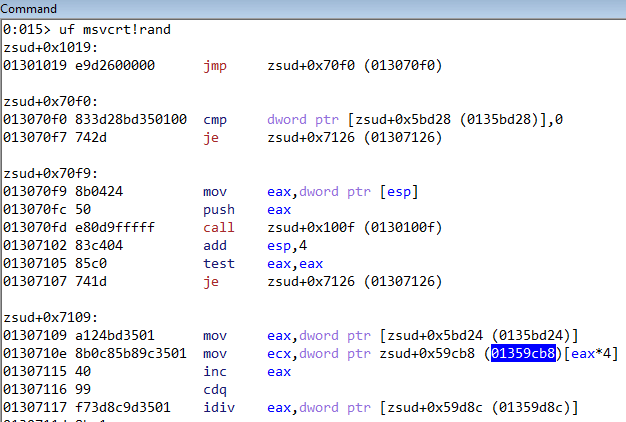
Going down the disassembly listing we can see that the code is accessing the location 0x1359cb8 as an array. If we dump the memory at this location we can see a list of integers.
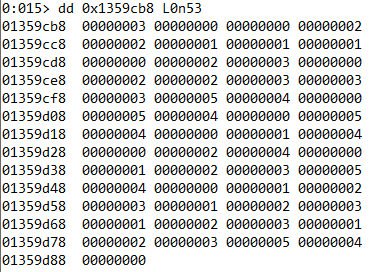
In fact the hooked rand implementation is returning numbers from the above list. If we convert these numbers to the respective directions we get the following.
w, n, n, e, e, s, s, s, n, e, w, n, e, e, w, w, w, d, u, n, d, u, n, d, u, n, s, u, n, e, u, n, s, e, w, d, u, n, s, e, w, s, e, w, s, e, w, s, e, w, d, u, n
Getting the flag
The final task is to execute the moves in a sequential order from the above list after obtaining the “key” from the lobby. After executing the above moves we will be taken back to the starting point.
From here we need to go to the office to get the flag by the following moves.
n, e, n, n, n, drop key, get helmet, wear helmet, say kevin hello
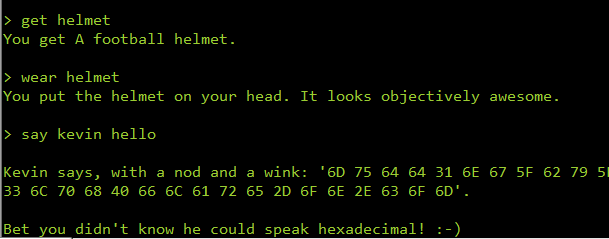
Converting the hex string to ASCII we get the flag mudd1ng_by_y0ur53lph@flare-on.com .
#8 – flair.apk
This is an android challenge, a welcome refreshment from the Windows-based problems faced so far. We can run the apk on an emulator or a device. Here I have used Android-x86. The challenge is comprised of multiple levels in the form of activities. We can use an online apk decompiler for reversing the apk back to its source code.
Analysis of the decompiled code
Lets have a look at the app manifest file AndroidManifest.xml
There are five activities named Chotchkies, Michael, Brian, Milton and Printer. Among them, the first one is the main activity. Let’s have a look at it.
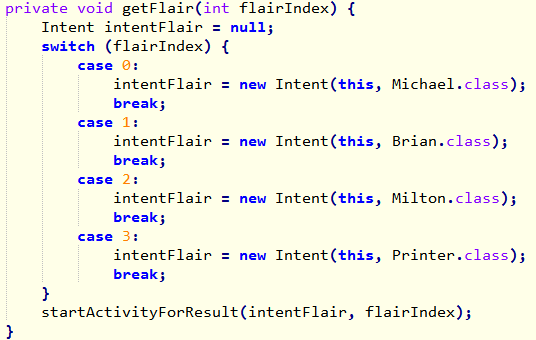
From the above decompiled code, we can notice the main activity has a switch case to start the four activities depending on the value in flairIndex. These four activities are the four levels.
Activity Michael
This activity is straightforward. We need to enter a password and the app would check it.
The function which checks the password simple.
private boolean checkPassword(String pw) { if (pw.isEmpty() || pw.length() != 12) { return false; } boolean result = true; if (!pw.startsWith("M")) { result = false; } if (pw.indexOf(89) != 1) { result = false; } if (!pw.substring(2, 5).equals("PRS")) { result = false;HE } if (!(pw.codePointAt(5) == 72 && pw.codePointAt(6) == 69)) { result = false; } if (!(pw.charAt(7) == pw.charAt(8) && pw.substring(7, 9).hashCode() == 3040)) { result = false; } if (pw.indexOf("FT") != 9) { result = false; } if (pw.lastIndexOf(87) != pw.length() - 1) { return false; } return result; }
By analyzing the code, we can deduce the following information about the password
- Length(pass) = 12
- pass[0] = M
- pass[1] = Y (89)
- pass[2:4] = PRS
- pass[5] = H
- pass[6] = E
- pass[7] = passw[8]
- hashCode(pass[7:8]) = 3040
- pass[9:10] = FT
- pass[11] = W (87)
For finding pass[7] and pass[8] we can bruteforce the hash code.
class Main { public static void main(String[] args) { for (char ch = 0; ch < 128; ch++) { String s = ch + "" + ch; if (s.hashCode() == 3040) { System.out.println(s); break; } } } }
Running, we get pass[7:8] = __.
The complete password to pass this level is MYPRSHE__FTW.
Activity Brian
Similar to the previous activity we need to provide a password.
The code which checks the password is a bit different.
public class Brian extends AppCompatActivity implements OnClickListener { EditText q; private int tEr; protected void onCreate(Bundle savedInstanceState) { super.onCreate(savedInstanceState); setContentView((int) R.layout.activity_brian); ((Button) findViewById(R.id.rewytu)).setOnClickListener(this); this.q = (EditText) findViewById(R.id.xkcvlr); } public void onClick(View v) { switch (v.getId()) { case R.id.rewytu: String x = this.q.getText().toString(); if (teraljdknh(x, asdjfnhaxshcvhuw((TextView) findViewById(R.id.vcxv), (ImageView) findViewById(R.id.pfdu)))) { Util.flairSuccess(this, x); return; } Util.flairSadness(this, this.tEr); this.tEr++; return; default: return; } } private String asdjfnhaxshcvhuw(TextView d, ImageView p) { int a = d.getCurrentTextColor() & SupportMenu.USER_MASK; String z = d.getText().toString().split(" ")[4]; try { return dfysadf(p.getTag().toString(), a, z, getApplicationContext().getPackageManager().getApplicationInfo(getApplicationContext().getPackageName(), 128).metaData.getString("vdf")); } catch (NameNotFoundException e) { e.printStackTrace(); return null; } } private String dfysadf(String t, int p, String c, String y) { return String.format("%s_%s%x_%s!", new Object[]{t, y, Integer.valueOf(p), c}); } private boolean teraljdknh(String v, String m) { return v.equals(m); } }
The teraljdknh function compare our input password to a string generated at runtime. This string is built in the function asdjfnhaxshcvhuw by taking several pieces of information like the color of the TextView etc. We can solve this in the same way as previous by building the string manually but an easier way is through dynamic analysis. If we run the app and hook the string comparison function we can easily find the password by inspecting the value of the parameters. We will be using frida for dynamic analysis.
Using Frida
A short tutorial on setting up Frida can be found here. Frida uses a Python API with a JavaScript debugging logic. We will hook the string comparison function and log the parameters when it’s called. The hook code will be in JavaScript.
import frida jscode = """ console.log("[+] Script loaded successfully..."); Java.perform(function x() { var brian = Java.use("com.flare_on.flair.Brian"); brian.teraljdknh.implementation = function(s1,s2) { console.log("[] arg1=" + s1); console.log("[] arg2=" + s2); return this.teraljdknh(s1, s2); }; }); """ device = frida.get_usb_device() process = device.attach('com.flare_on.flair') script = process.create_script(jscode) script.load() raw_input()
The code above is hooks the teraljdknh function. When called, it prints the parameters to the console. Running this and using “mypassword” as our input, we get a log.
[+] Script loaded successfully... [] arg1=mypassword [] arg2=hashtag_covfefe_Fajitas!
The correct password is thus hashtag_covfefe_Fajitas!.
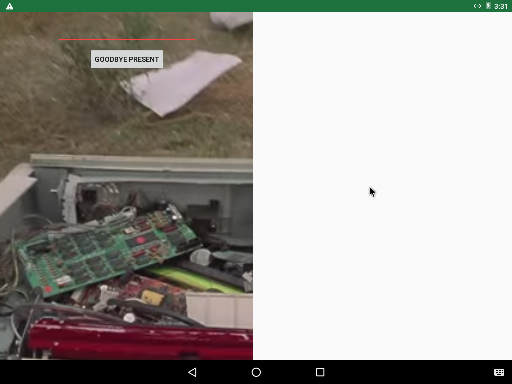
Activity Milton
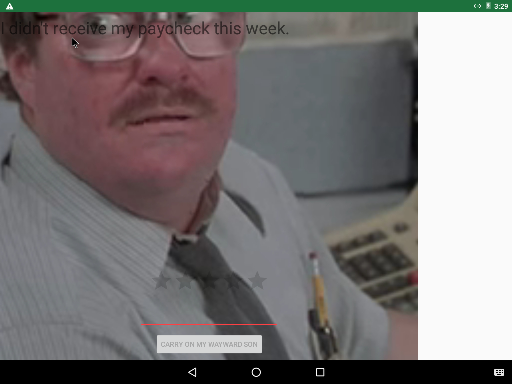
The third activity has a rating bar which must be set to a value of 4 in order to enable the check button. This is evident from the decompiled code below.
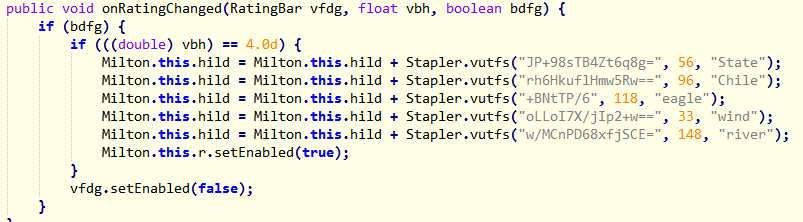
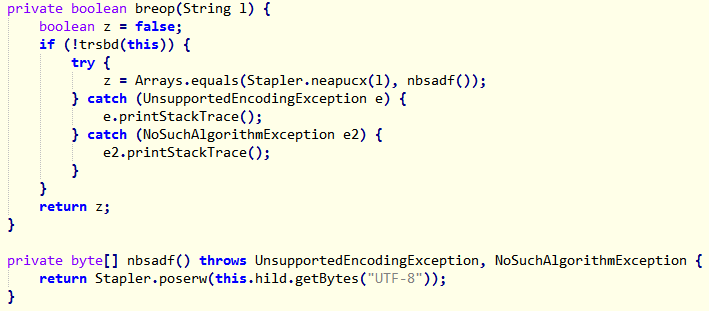
Down below we can see a byte array is computed from our input password by the Stapler::neapucx function. This is compared to another array returned from the function nbsadf.
We can hook this function in frida to find out the array returned. I have only provided the JavaScript code below. The Python code which injects the JS is the same as before.
console.log("[+] Script loaded successfully..."); Java.perform(function x() { var milton = Java.use("com.flare_on.flair.Milton"); milton.nbsadf.implementation = function () { retval = this.nbsadf(); console.log("[*] retval="+retval); return retval; }; });
Running, we can get the byte array from the trace.
[+] Script loaded successfully... [*] retval=16,-82,-91,-108,-125,30,11,66,-71,86,-59,120,-17,-102,109,68,-18,57,-109,-115
We need to inspect the Stapler::neapucx function.
static byte[] neapucx(String bro) { int kon = bro.length(); if (kon % 2 == 1) { return null; } byte[] ce = new byte[(kon / 2)]; for (int vdsfv = 0; vdsfv < kon; vdsfv += 2) { ce[vdsfv / 2] = (byte) ((Character.digit(bro.charAt(vdsfv), 16) << 4) + Character.digit(bro.charAt(vdsfv + 1), 16)); } return ce; }
Based on the decompiled code, we can bruteforce the password.
public class Main { public static void main(String args[]) { byte[] b_arr = new byte[] {16,-82,-91,-108,-125,30,11,66,-71,86,-59,120,-17,-102,109,68,-18,57,-109,-115}; char keyspace[] = "0123456789abcdef".toCharArray(); for (byte b: b_arr) { next: for (char c1: keyspace) { for (char c2: keyspace) { byte x = (byte)((Character.digit(c1, 16) << 4) + Character.digit(c2, 16)); if (b == x) { System.out.print(c1 + "" + c2); break next; } } } } } }
The password is 10aea594831e0b42b956c578ef9a6d44ee39938d.
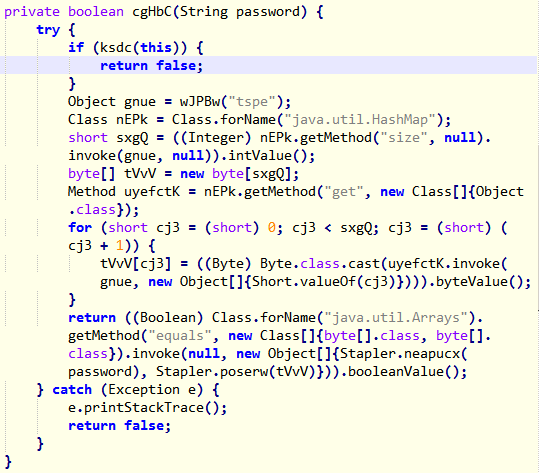
Activity Printer
The password checking logic in this level is the same as previous. An array is computed from our input and this is compared with another one generated at runtime by the function Stapler::poserw .
We need to dump this byte array using Frida in the same way as before.
console.log("[+] Script loaded successfully..."); Java.perform(function x() { var stapler = Java.use("com.flare_on.flair.Stapler"); stapler.poserw.implementation = function (p) { retval = this.poserw(p); console.log("[*] retval="+retval); return retval; }; });
Running this, we get the log.
[+] Script loaded successfully... [*] retval=95,27,-29,-55,-80,-127,-60,13,-33,-60,-96,35,-127,86,0,-114,-25,30,36,-92
From here we can bruteforce the password.
public class Main { public static void main(String args[]) throws Exception { byte[] b_arr = new byte[] {95,27,-29,-55,-80,-127,-60,13,-33,-60,-96,35,-127,86,0,-114,-25,30,36,-92}; char keyspace[] = "0123456789abcdef".toCharArray(); for (byte b: b_arr) { next: for (char c1: keyspace) { for (char c2: keyspace) { byte x = (byte)((Character.digit(c1, 16) << 4) + Character.digit(c2, 16)); if (b == x) { System.out.print(c1 + "" + c2); break next; } } } } } }
The password is 5f1be3c9b081c40ddfc4a0238156008ee71e24a4.
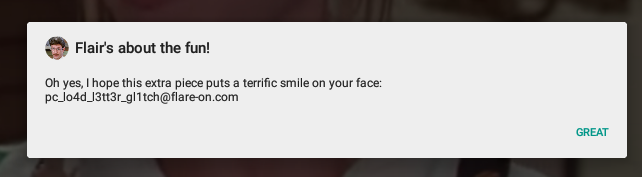
Completing all the four sub levels we get the flag pc_lo4d_l3tt3r_gl1tch@flare-on.com .

)
)
)
)