This is part 5 of the Flare-On 5 CTF writeup series.
7. WOW
Wow, just.... Wow.
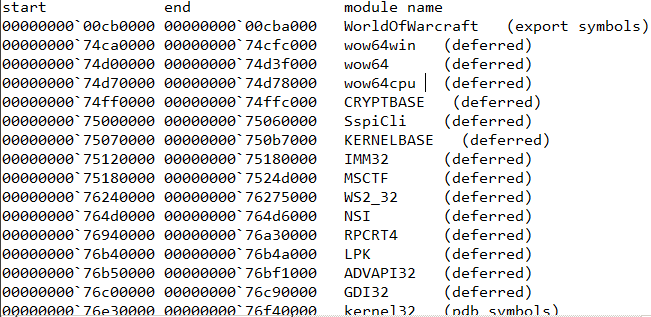
WOW stands for World of Warcraft, a highly popular MMORPG from Blizzard Entertainment. Our challenge binary is also named the same - WorldOfWarcraft.exe. It's a 32 bit PE file. Let us have a look in IDA.
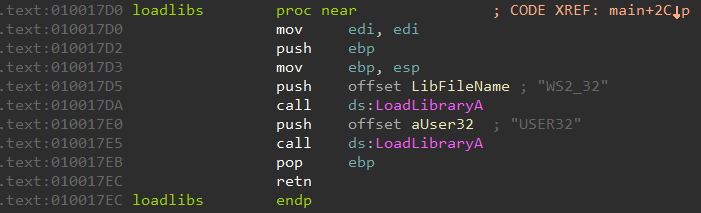
The main function loads WS2_32.DLL and USER32.DLL by calling LoadLibraryA. Among them, the former is the Winsock DLL commonly used for network-based applications.
Next, it checks Windows version number.
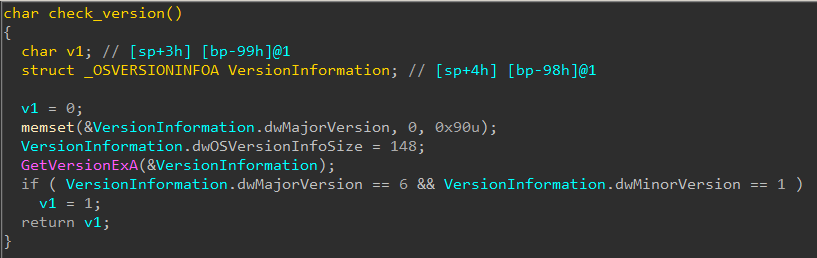
The version must be greater than 6.1 (Windows 7 and above) or else it returns false and the program quits.
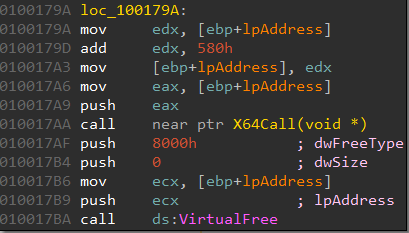
Next, it reserves a space 0x5800 bytes and copies some data to it. 
The data is encrypted.
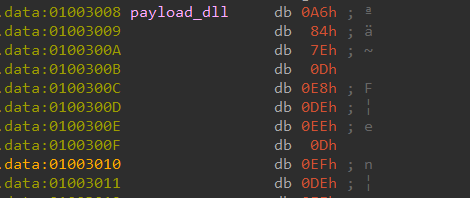
A few lines below, the encrypted data is XOR decrypted using the hardcoded key 0xDEEDEEB. We can write a quick IDA Python script to do the same.

Open payload.bin in CFF Explorer reveals that its actually a PE64 DLL. The PDB path embedded inside the DLL suggests that the original name is likely crackme.dll

Coming back to the main binary WorldOfWarcraft.exe, it exports a single function named X64Call. This is called from 10017AA. The argument to the function call is the address of the buffer which contains the decrypted DLL code.
The term X64call may sound familiar to some. Yes, this function uses the same technique, popularly known as "Heavens' Gate" to switch the processor to 64-bit mode although the PE is a 32 bit one. The 64-bit versions of Windows allow running 32-bit executables unmodified using a compatibility layer known as Windows on Windows 64 or WoW64 sometimes shortened as WoW. So it's not World of Warcraft after all.
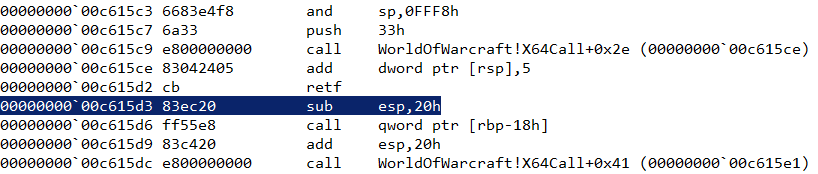
Let us have a look at the disassembly of X64Call.
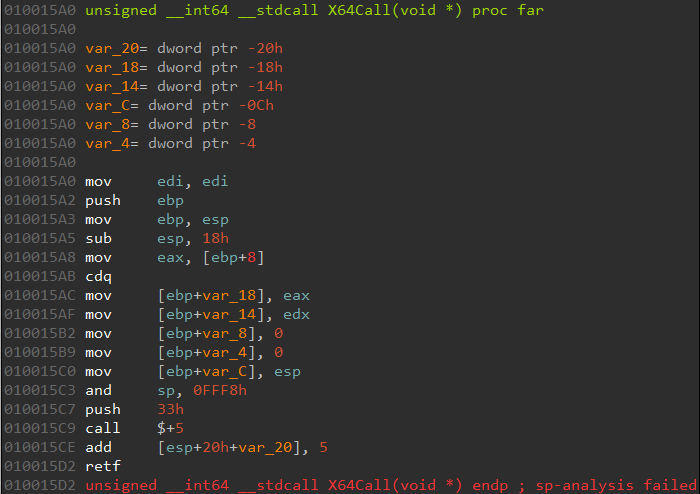
Note the retf instruction at the end. It stands for FAR RETURN. Unlike ret, the retf instruction can jump to code that's located in a different segment. It pops two dwords from the stack - the first contains the new IP to resume execution, the second contains the segment selector. In this case, the segment selector is 0x33 set at 10015C7. For more information about the 0x33 segment selector and this technique in general, check out these articles -
- https://www.malwaretech.com/2014/02/the-0x33-segment-selector-heavens-gate.html
- http://rce.co/knockin-on-heavens-gate-dynamic-processor-mode-switching/
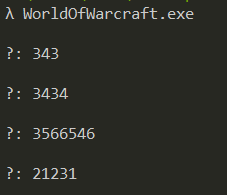
At this point, it is certain, that we must run the binary in a 64 bit Windows as its using the WoW64 emulation feature. Running the binary on a 64-bit system it prompts for input.
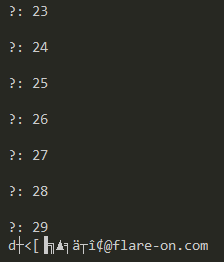
After reading twenty-nine integers it prints a gibberish flag which implies providing the correct sequence of integers would give us the proper flag.
We need to debug the binary to understand what's its doing after switching to 64-bit mode. However, debugging code that uses WoW64 is tricky. Common user mode debuggers like x64dbg or the IDA local win32 debugger loose control of the debuggee as soon as we single step on the retf instruction. Fortunately, WinDbg works just as good and properly switches itself to 64-bit mode on encountering the retf instruction.
Debugging in WinDBG
Set a breakpoint on X64Call and single step until we reach the retf instruction.

At this point, single stepping once more executes the FAR RETURN instruction and the processor switches to 64 bit.
Recall, that one of the arguments to X64Call was a pointer to the 64 bit crackme.dll. Its highly likely that after switching to 64 bit, the binary executes code from there.
The imported functions for crackme.dll doesn't reveal anything useful but a string search does.
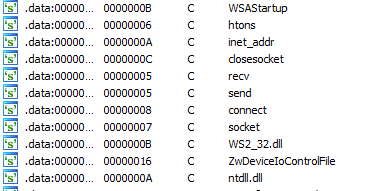
htons, inet_addr, recv, send, connect are all windows socket function. The presence of these strings suggests they are likely resolved at runtime as they are absent under the imports tab.
If we set a breakpoint on connect and resume execution in WinDBG its get hit as soon as we enter an integer as input. Debugging further we can find that the integer we are providing as input is used as a port number. Apparently, it looks that the program is trying to connect to that port.
However, strangely the connect calls always failed even after setting up a socket listener at that port. After a few more tries it became evident that the connect call is not what it seems. Tracing through connect we eventually land within crackme.dll without performing any syscall.
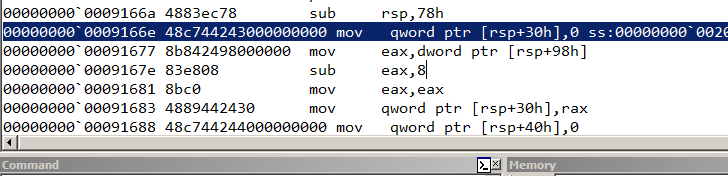
This was a tell-tale sign that the system API (NtDeviceIoControlFile) responsible for connect was hooked. Searching for the pattern of bytes 48 83 ec 78 48 c7 44 24 30 00 00 00 00 in crackme.dll in IDA we locate the function at 180001660 which implements the hook.
The code has a switch-case to handle the various IOCTLS.
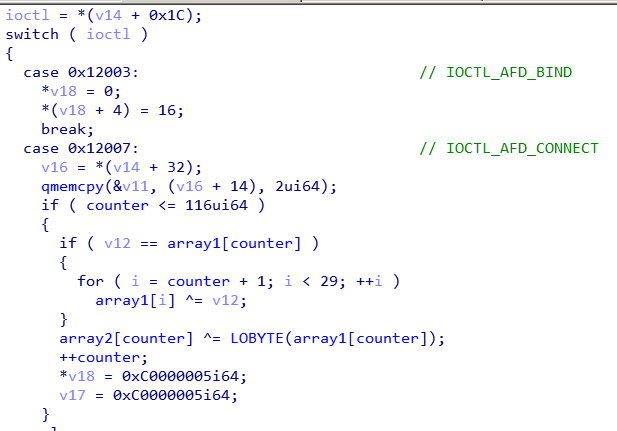
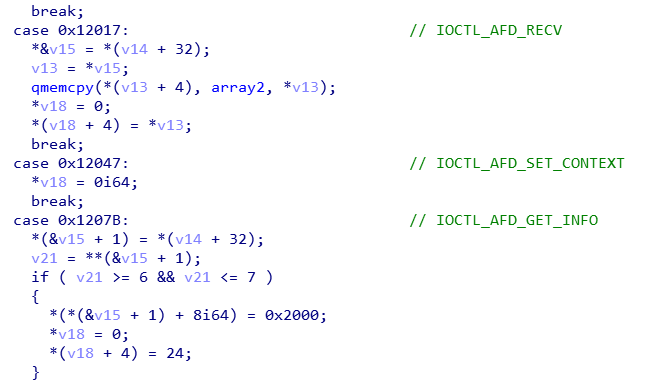
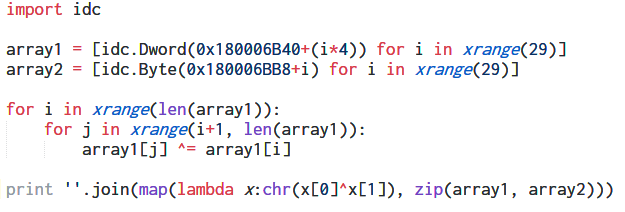
Inside the case statement for the CONNECT IOCTL, we can see that the contents of array1 are XORed with the counter (which holds the current turn number) before being XORed with array2[counter]. Implementing the same logic in an IDA Python script we get the flag.
FLAG: P0rt_Kn0ck1ng_0n_he4v3ns_d00r@flare-on.com
8. Doogie Hacker
You are absolutely crushing this. Saved off the first few sectors from a hard drive that some computer genius had back in the 90s. People say the kid used to write his own computer software but that sounds crazy. This little prankster left us a secret message I think.
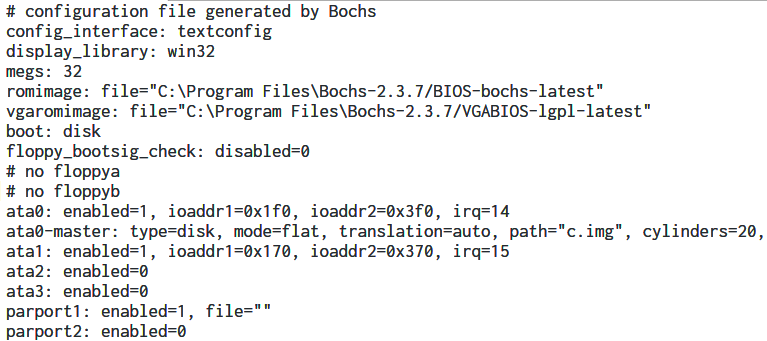
Challenge 8 takes us back to the 90s. We are provided with a raw dump of the first few sectors of a hard drive which includes the Master Boot Record (MBR). We can use the BOCHS emulator to run this.
Looks simple enough. The task is to find the correct password. IDA Pro supports debugging MBR through Bochs - the steps are outlined here. We need to create the Bochs config file (.bxrc) and load it in IDA.
IDA parses the bxrc file and loads the corresponding IMG file containing the challenge code at the appropriate location.
Debugging in Bochs
The first 512 bytes of a bootable drive is called as the MBR. When a PC boots up, the BIOS copies the first few sectors to a fixed location in memory at 0000:7C00 and jumps to that address to continue execution in 16-bit real mode.
Debugging in Bochs we can find the same. Execution starts at 0000:7C00. This is not a linear address but rather uses the SEGMENT:OFFSET addressing scheme.
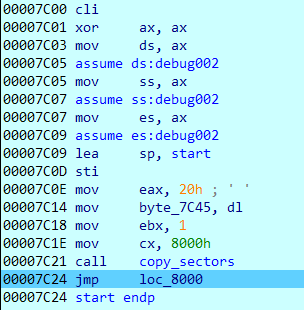
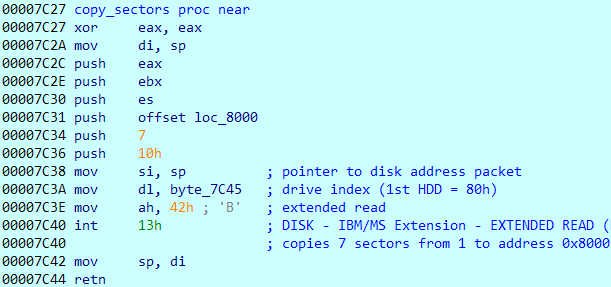
It copies 7 sectors to address 8000 before jumping to that address.
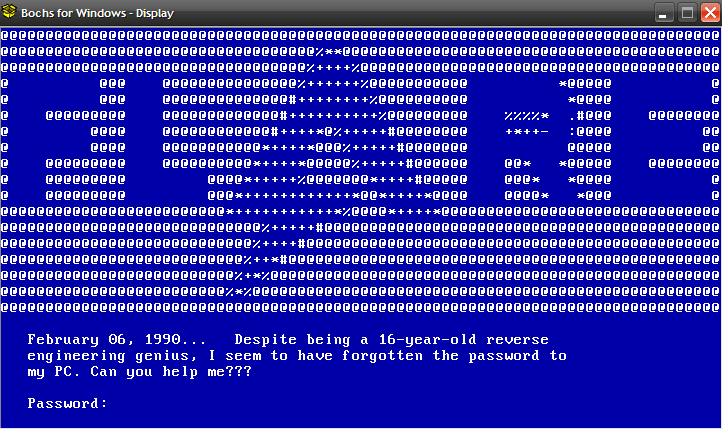
The print_intro function clears the screen and displays show the introductory message consisting of the "FLARE" ASCII art.

The get_date procedure obtains the current date using the int 1A BIOS interrupt.
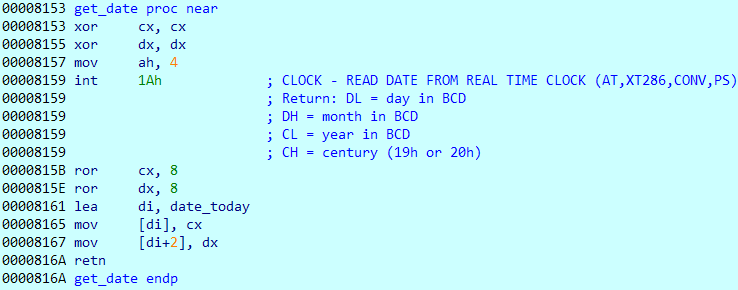
The date returned is in BCD notation. This is saved to the date_today variable.

The function xor_buffer XORs a hardcoded buffer with the date thus obtained.
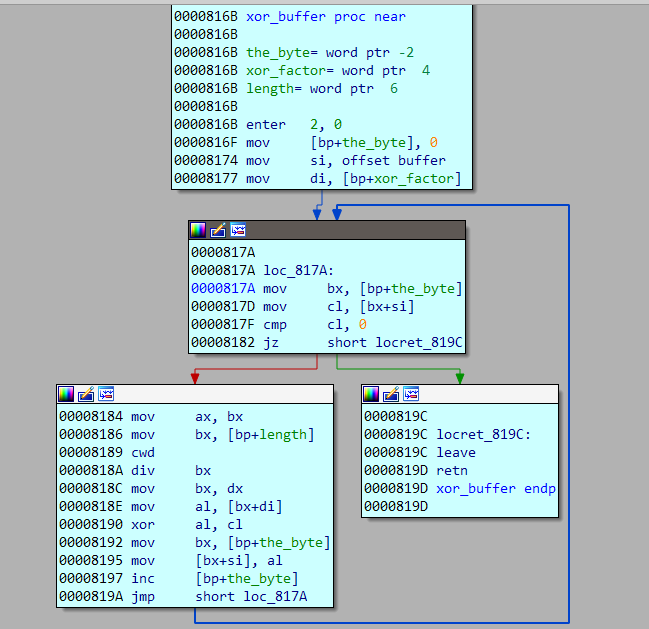
Using an IDA Python script we can dump the buffer.
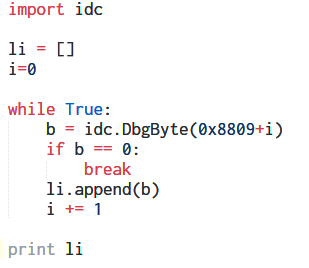
Coming back, the read_password function inputs the password from the user. The password is then again XORed with the buffer. Thus the buffer is XORed two times, first with the current date and then with the password.
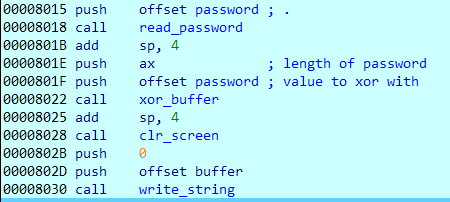
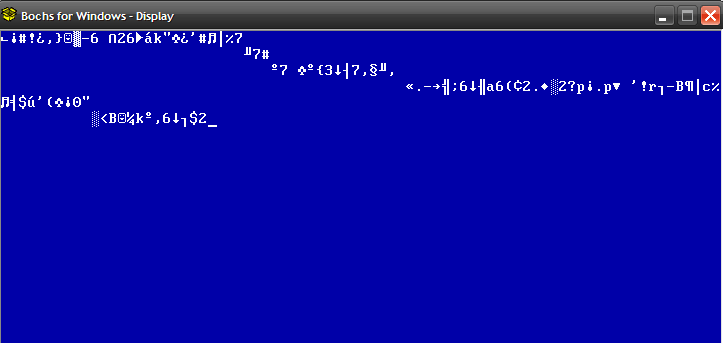
Finally, the contents of the buffer are printed on the screen. Since we know neither the date nor the correct password we get a gibberish output.
So all in all, we need to figure out both the correct date and the password to decrypt the buffer.
Implementing the logic in Python
The entire logic can be implemented in a Python script.
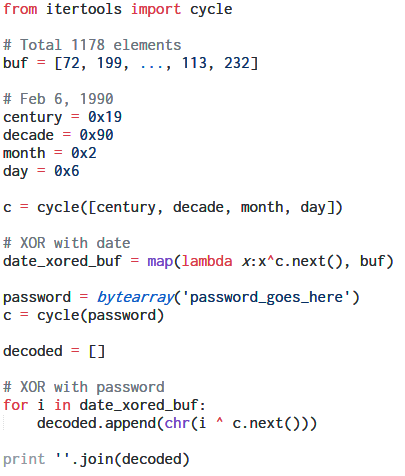
The introductory message shows the date as February 6, 1990. We can assume this to be the correct date.
Using the Z3 SMT solver
We can use Z3 to find a probable password such that the decrypted buffer consists of mostly printable characters. The buffer to hold the password can hold a maximum of 21 characters.
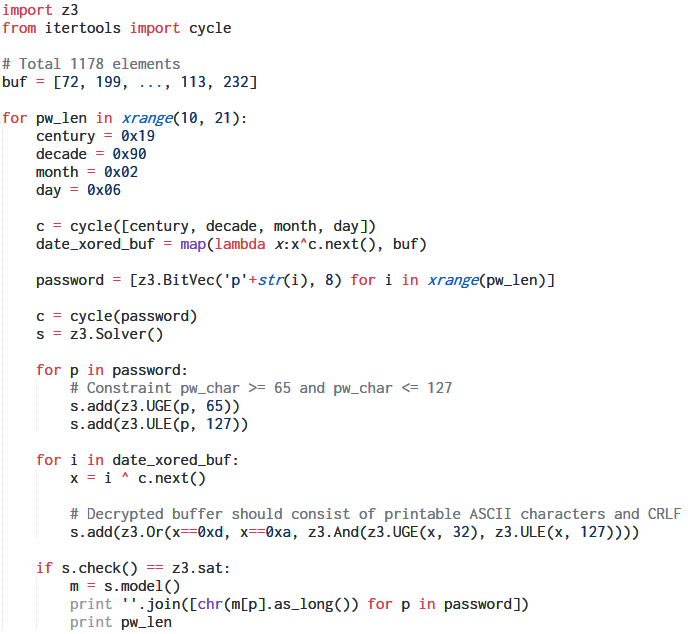
The script tries to find a password consisting of characters in the ASCII range 65-127 having a length of 10 to 21.
$ python z3-findpw.py
ihwbufsehimakpfre
17
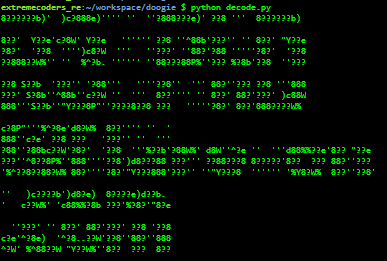
Running, the script shows ihwbufsehimakpfre as a possible candidate password. Using this as a password we get the following output which makes no sense at first sight.
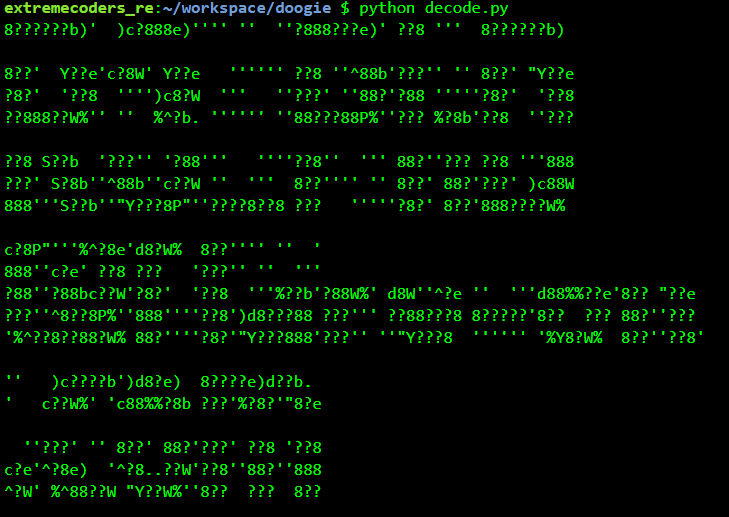
However, if we zoom out, it does make sense. The flag is in an ASCII art form.
FLAG: R3_PhD@flare-on.com
Continue to the next part: Flare-on 5 CTF Write-up (Part 6)

)
)
)
)